Connecting to the Job Scheduler using AbatConsole
This section describes the Connection Manager, which is used to establish a connection to a Job Scheduler when using the AbatConsole client.
First, start AbatConsole by either double-clicking on its desktop icon or by selecting the program through the ActiveBatch program menu (the assumption is you have access to the AbatConsole client application). AbatConsole supports connecting to one or more Job Schedulers. For example, you may have multiple Job Scheduler environments, such as Production and Test. Or, you may have 2 production Job Schedulers. Regardless, you can connect to more than one Job Scheduler using one AbatConsole session (providing you have connect permissions to the Schedulers). As the Job Scheduler name implies, this component handles the scheduling and dispatch of jobs. The Job Scheduler runs as a Windows Service.
Note: If Microsoft Windows UAC is enabled on your system and your Job Scheduler is on the same machine - and you expect to execute the privileges of an ActiveBatch Administrator, you must right-click and issue the “Run As Administrator” operation when launching AbatConsole. You must also click “Yes” to the Windows UAC prompt. If your Job Scheduler is on a different machine then your client, this requirement is not applicable to you.
After starting AbatConsole, you will see a tabbed Start page. To create a Scheduler connection, click on the Start Page's New Connection link, or click on the Console's ActiveBatch menu option, then select Connect - or press the F4 hot key. The Connection Manager dialog will appear. The figure below shows the Initial Connection dialog for the Connection Manager, when creating a new connection, and no prior connections have been established.
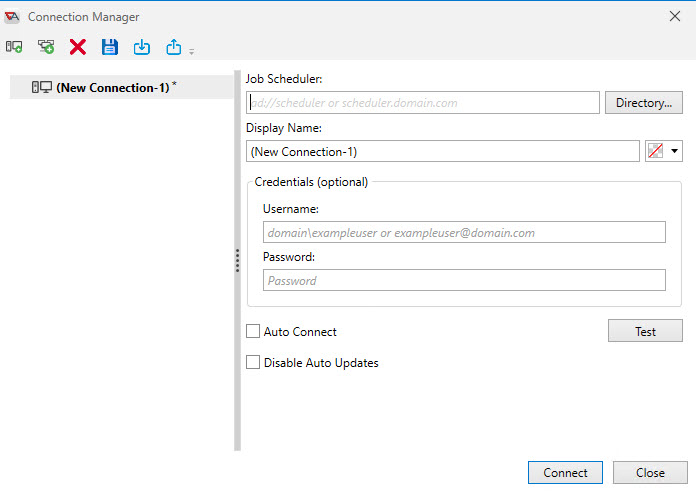
The Connection Manager allows you to create, modify, delete and otherwise manage your ActiveBatch Job Scheduler connections. The Connection Manager consists of a left and right section. The left section is a list of existing or about-to-be-created connections. Each connection is uniquely named. The tool bar consists of icon which represent the following actions: New Connection, New Group, Delete Connection (or Group), Save All, Import Connection List, Export Connection List.
New Connection
The Job Scheduler field requires a machine name, FQDN, IP address or published name (see Directory button) to connect to. You can also connect to a Scheduler's virtual root, if using this feature. Virtual Root allows a user to connect to a folder or plan object, and not the root of the Job Scheduler. This provides object isolation. Next, the published name refers to a Job Scheduler, plan or folder object that has been published to Active Directory (AD) or Active Directory Lightweight Directory Services (AD LDS). Using a published name is only an option when you have installed the Directory Services kit (a separate download at the ASCI website) and extended the schema for AD or AD LDS. Using AD or AD LDS is purely optional. You have a fully functional Job Scheduler whether you use this feature or not.
To keep this example simple, we will use the Scheduler's hostname in the Job Scheduler field. As you enter the hostname, the Display Name field is also automatically updated (which you can change - as depicted in the image below), and that becomes the index for the list of connections on the left side of the dialog box. It is also the name you will see in the Scheduler's connection tab in AbatConsole, and at the top of the Object Navigation Pane, which identifies the Scheduler object.
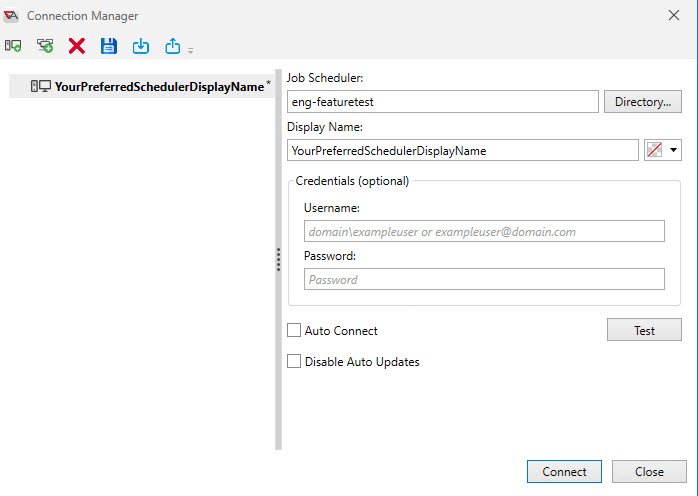
After you have specified a machine in the Job Scheduler field and a display name, click on the Connect button to attempt the connection (or click the Test button to test the connection). A successful connection results in the creation of a new Object Navigation pane, named using the Display Name value, with the ActiveBatch objects retrieved from that Scheduler.
By default, ActiveBatch will attempt to connect to both the Job Scheduler and the Job Scheduler’s machine WMI provider to receive ActiveBatch events. If, for security or firewall reasons, you can’t connect to WMI or you don’t want to connect to WMI, simply check the box Disable Auto Updates. This will disable the auto-refresh capability for your specific connection to that Job Scheduler. See also Managing WMI Security.
When you initially start the ActiveBatch Console, any Job Schedulers you were connected to will only appear (and be automatically connected to) if you enabled the Auto Connect checkbox depicted in the above image. If Auto Connect is not checked for any of the connections you have created using the Connection Manager, then you will be presented with the Start Page after launching AbatConsole.
A basic connection assumes that your current authentication credentials are sufficient to connect to the named Job Scheduler machine. However, if you are logged onto a Windows machine that is not part of the security domain of the Job Scheduler machine, you will need to present your authentication credentials to ActiveBatch so you can be authenticated. To perform an extended authentication check, enter a valid Username and Password that can be authenticated on the selected Job Scheduler system. This will typically be a domain user account for Windows. The Test button allows you to verify the credentials prior to performing the actual connection. Once you’ve entered the information you may click the Connect button to allow ActiveBatch to attempt a connection with the authentication credentials you have supplied.
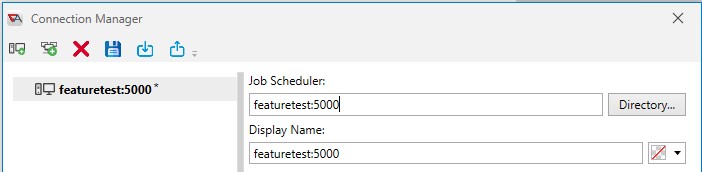
Firewall connection
This type of connection is typically used when a firewall is setup between the client and Job Scheduler machines. When a firewall is used, the connection is made to the firewall and a specific port. The firewall then relays the connection to the appropriate internal Job Scheduler machine behind the firewall. The firewall machine can be specified using standard TCP/IP notation (hostname, FQDN, IP address). The port number is specified by use of a colon (:) and number. For example, hostname:5000 would tell the client to connect to a machine named hostname using port number 5000.
Once you have connected to the Job Scheduler, AbatConsole will look something like this:
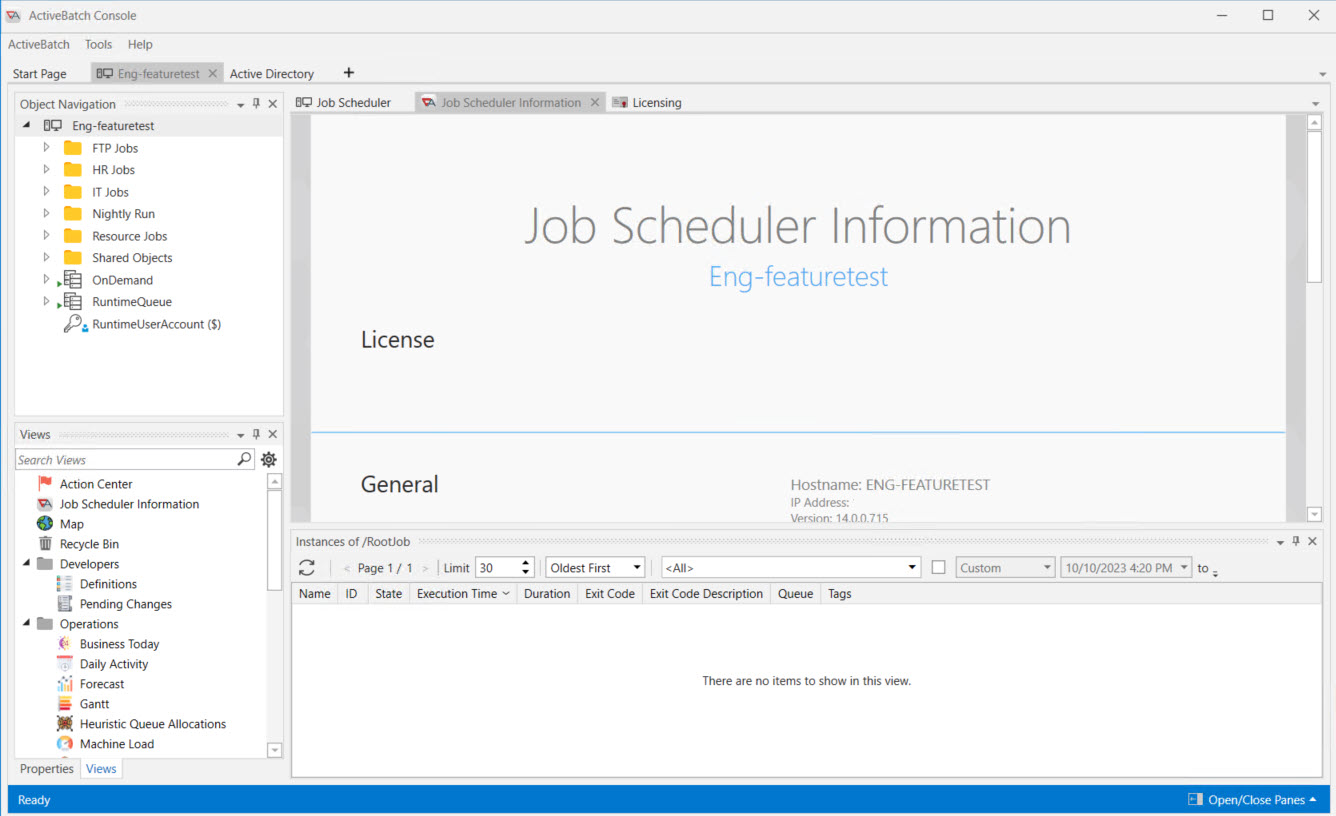
Please note the folders you see in the upper-land hand corner are user-defined. If you are a new user, you will only see the three objects at the bottom of the list - OnDemand, RuntimeQueue and RuntimeUserAccount. There objects are built-into the product and part of a basic installation.
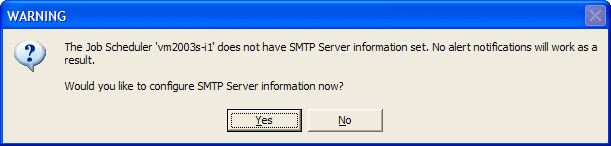
When you initially connect to an ActiveBatch system as an ActiveBatch Administrator, you will be reminded to configure the SMTP Server if you have not done so already. See the ActiveBatch Parameter Configuration (Job Scheduler SMTP) section for more details. It is important to configure the Scheduler's SMTP Server information if you want to send out ActiveBatch alerts (e.g., a job failed) using email.
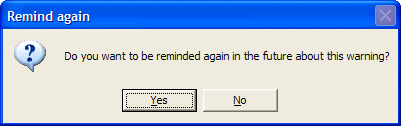
If you decline the reminder you will be prompted as to whether ActiveBatch should stop providing the reminder.
You may also see a message pop up if DbPurge, the built-in system job that cleans up the backend database and log files is not configured to run. It is important to run DbPurge regularly. See