Assigning Object Security
Every ActiveBatch object is fully securable. Every object has a Security property sheet, where security is configured. If Factory Default security is being used, the local Administrators group and the Authenticated Users group are added to the Security property sheet (when new objects are created), and default permissions for the two groups are applied.
Many customers change the factory default security to better match their organization's security requirements. What is not desired is to require ActiveBatch developers, the individuals creating the objects, to have to configure security. As a best practice, it should be preset for them. This removes the chance of data entry errors (the wrong permission is allowed or denied accidentally), and it saves the developer time.
The best practice approach is to preset object security by adding a Default Policy for every object type you can create using ActiveBatch, even for the ones you aren't sure you will be using. If you set a default policy for each object type at the Scheduler (root) level, then this is the only place you need to do this (the default policy will be applied system-wide). This works well if the security will be the same no matter where the object is being created (at the Scheduler root, or in any folder or plan). You can set default policies on any folder or plan as well. This would take precedence over what is set on the root, when new objects are added to a folder or plan. New objects use the default policy set on the container (root, plan or folder) that is closest to where they are being placed, which is their parent container. If a default policy for the object type being added has not been configured on their parent container, the system looks to the next closest container, going all the way to root, if necessary, to find and apply a default policy. The first place a default policy is found within the fullpath of the new object, it is applied.
For example, assume JobA is being added PlanZ, and when saved, the fullpath of JobA is /Folder1/Folder2/PlanZ. When the user first selects New > Job, the Scheduler will look to see if a default job policy has been created on PlanZ (the parent container). If not configured there, it looks on Folder2. If not configured there, it looks on Folder1. If not configured there, it looks on the root of the Job Scheduler. If not found there, factory default security is applied. As mentioned, as soon as a default policy is found for the object type being created, the system stops looking and uses it.
Note: To create a default policy at the Scheduler root, or on a folder or plan, right click on the desired container, then select Policy > Defaults.
Note: Default Polices can also preset many (there are a few exceptions) other new object properties that are either blank by default, or contain factory default values you wish to override. Therefore, default policies are not limited to just presetting security, although security is an important use of this feature.
Next, there are two ways you can preset security for each object type a user can create. Both involve using a default policy. The first method described below is the easiest way to manage and maintain ActiveBatch security.
-
Create a Default Policy for each object type where the object's Security property sheet has the "Inherit Security from Parent Object" property checked. This property is NOT checked by default. If you check this property as the default security policy, this means that whenever a new object is created that uses this policy, the Security property sheet will display the users/groups and their associated permissions in read-only mode. This is because the new object is inheriting its security from its parent container (root, folder or plan, depending where the object is being created). The ActiveBatch Administrator would then set security on the parent container. The ActiveBatch developer does not have to configure the Security property sheet. If security on the parent container should ever be changed by an ActiveBatch Administrator, the change is automatically inherited by the child objects that have the Inherit Security from Parent Object property checked.
-
Create a Default Policy for each object type where the object's Security property sheet includes the users and/or groups (and their associated permissions) that will have access to the newly created object. In this case, new objects are NOT inheriting security from their parent container. This method will work fine, in the sense that ActiveBatch developers will not have to modify the preset security, and the desired users and/or groups will be granted proper access.
Please note that this method can be more difficult to manage should the users and/or groups change over time. It would be undesirable to have to modify many existing objects to update their new security (e.g. delete or add a user or group, and/or modify permissions). In this scenario, to update security for many objects at once, you could use the Root, Plan or Folder property named "Replace permission entries on all child objects with entries shown here". This property is located on the container's security property sheet. For the Plan and Folder objects, this property is only visible when the container's "Inherit Security from Parent Object" property is NOT checked. It is often referred to as the "Push Down" security feature. Checking this property's checkbox, then saving the object changes does an automated update where every object that has the container within its full path (child objects and nested child objects) will have their security deleted, then replaced to match the parent containers security (for the permissions that apply to the child objects).
In summary, to update child objects and nested child objects with modified security using an automated method, you would need to make the security changes on the desired container, then check the "Replace permission entries on all child objects with entries shown here" checkbox. After the security has been replaced (which happens under-the-hood, when the root, folder or plan is saved), you could then update the container's security to whatever it should be - if the security changes made on the container were only done (temporarily) to use the "Replace permissions..." feature (i.e. the parent container and child object security do not normally match). If they do match, then you may want to consider using Inherit Security (option 1) as your way to manage ActiveBatch object security. It would avoid the need to perform this "Replace permissions..." action whenever a container's security changes, since child objects inherit security from the parent.
Every Folder and Plan also has a checkbox allowing you update child and nested child objects by removing their existing security and replacing it with "Inherit Security From Parent Object". The Folder and Plan property that performs this update is "Enable Inherit Security on all child objects". This property is only visible when the Folder or Plan does not has its "Inherit security from Parent Object" checkbox checked on the Security property sheet. If you check the "Enable Inherit Security on all child objects" checkbox, then save the container, the child objects of the container have their security removed and replaced where the "Inherit Security from Parent Object" checkbox is checked. This is very similar to the "Replace permissions..." feature described above, but instead of replacing users and/or groups and their security permissions, you are removing the users/groups from the child objects and checking the child objects' "Inherit security from Parent Object" checkbox. The child objects will now inherit security from the parent container.
Note: Inherit Security from Parent Object is a feature that was introduced in a later version of ActiveBatch. When it was introduced, the "Enable inherit security on all child objects" checkbox was also added to provide a quick method for customers to implement this new way to manage security, rather than having to manually update each object's security property sheet, or write a COM script - to check the new Inherit Security from Parent Object checkbox. Therefore, updating many child objects' security to Inherit Security was not something that ASCI intended to be a frequently used option, especially if the default policy for all new objects is "Inherit Security from Parent object". However, like the "Replace..." option described in item 1 above, the update can be done repeatedly. Since either mass update option is a checkbox that actually performs an action (it is not a "regular" static property setting), the checkbox is removed the next time you look at the security property sheet of the container where it was checked.
Setting Job Scheduler security
To set Job Scheduler security, navigate to the Scheduler object at the top of the Object Navigation pane, right-click on it, then select Properties. Click on the Security property sheet. This will bring up the Security properties dialog, as depicted in the image below.
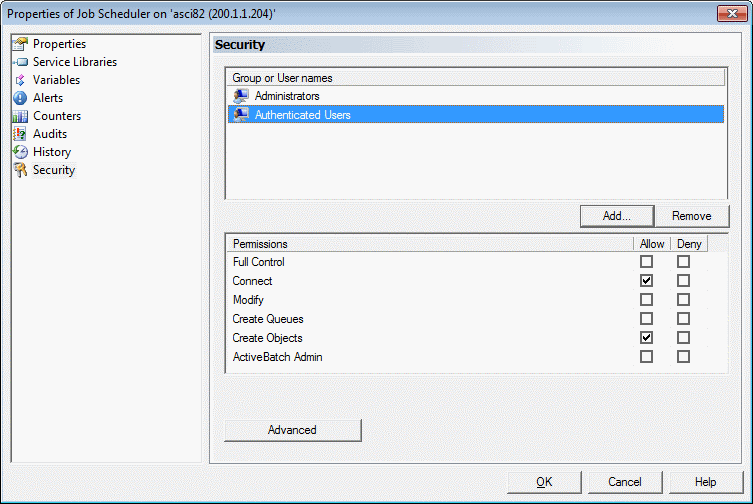
Similar to the Microsoft Windows security model, a security descriptor contains one or more groups and/or user names for the object. Access permissions are associated with the account/group. While some permissions are common to all objects, several are object specific. Permissions are broadly categorized as either Allow (Grant) or Deny.
Remove a user or group:
Click on the desired user or group, then click Remove
Add a new user or group:
Click on the Add button. The security dialog will appear, as depicted in the image below. It consists of several properties.
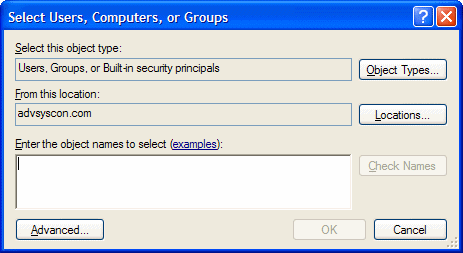
Object Types will typically be left as-is since you want to lookup Users, Groups or Built-in security principals.
Locations can be clicked on if you need to switch to another domain or if you want to switch to the local Job Scheduler machine (this is not recommended unless you are not running the product within a domain).
With your location set, you can now enter object names (i.e. users, groups, etc) in the large edit box provided. Each object name must be separated by a comma. To verify the object name against Active Directory, click the Check Names button. This will confirm your selection and change the object name to its full UPN syntax.
When you have completed entering the accounts/groups you want to add, click the OK button. Click Cancel to discard any proposed changes.
Modify a user or group:
To modify an existing Group or User's security, select the desired account.
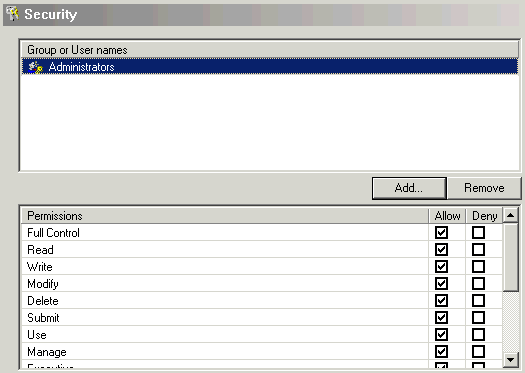
The list of permissions and their corresponding checkboxes will change to reflect the current set of permissions. Make your desired changes by checking or unchecking the desired permission(s). If you would like to apply your changes, click the OK button. To discard your changes, click the Cancel button.
Note: For any object that does not have the Inherit Security from Parent object property checked, you can add, modify or remove users and/or groups the same way as described above.