Default Policy
The default policy feature allows you to preset object properties to override factory default values with your own values - when new objects are created. Default policies can be set for each object type a user can create. Default policies can be set at the root of the Job Scheduler and on any Folder or Plan object (the three ActiveBatch containers). They are created on the container-level because they are policies governing objects that are placed in the container. This means you can have different default policies for different containers. Benefits of using this feature include:
-
Reducing typos and other data entry mistakes when new objects are being created.
-
Speeding up the process of object creation, since properties will be preset.
-
Setting standards, since the properties will be the same for objects that are using the policy.
-
Pushing down default policies to update existing objects within the container, when an object policy is added or changed (a time-saver).
How to create a default policy
Using the Object Navigation pane, right click on the desired container (Scheduler root, Folder or Plan) that you wish to create a default policy for. Select Policy > Defaults.
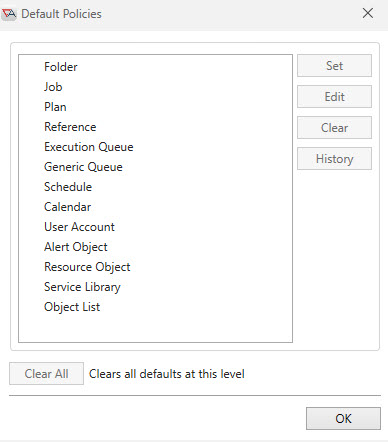
A Default Policies window will pop up. Select the object type you wish to create a default policy for, then click the SET button, as depicted in the image below.
A new tab will be added the Main view named Policy on <Object Name>. The new tab will display the property sheets for the object type you selected to create a policy for. This is because they are the object's property sheets - except you aren't creating a new object, you are creating a new default policy for that object.
Navigate to the property(s) you wish to preset and enter your desired values.
Note: If the property you wish to preset is not listed on the property sheet, that means there is a limitation that does not allow the property to be preset. For example, you cannot preset the Alert properties of a Default Job Policy. Therefore, the Alerts tab is not present when creating a Default Job Policy.
For most properties that you preset, you will see a red icon appear next to the property name, after you enter a value. This means that the property setting can be "pushed down" to existing child objects within the container you are adding the policy for. Note all properties support the push down feature, but most do. See below for more information regarding the push down feature.
There is a Push Down Changes toolbar menu item you can use (an optional feature ) to push down the property settings you specify to child objects of the same type for which you are creating the policy for. When Push Down is used, this means that child objects in the container where you are setting the default policy (and nested child objects, if any) will have their current property setting replaced with the default value(s) you have set. You can push down some or all of the default policy property settings via the Push Down Changes window that pops up when you click on the Push Down Changes option. The Push Down Changes window will list the preset properties (you set) that can be pushed down (there are a few exceptions, some can't be pushed down - those properties won't appear in the list), and you can check or uncheck which properties you wish to push down.
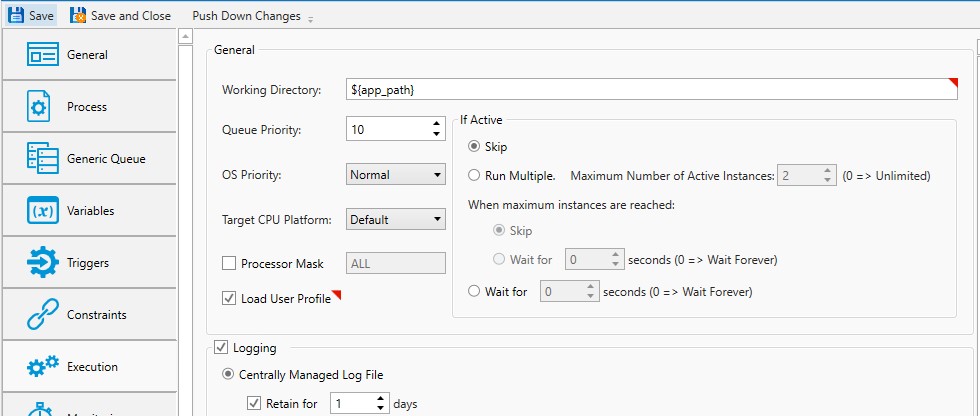
In the example, below, the Submission Queue (on another tab not visible in the image), Working Directory and Load User Profile properties have been changed.
To apply these default property value changes to your existing objects, press the Push Down Changes button. When you do, the following confirmation box appears.
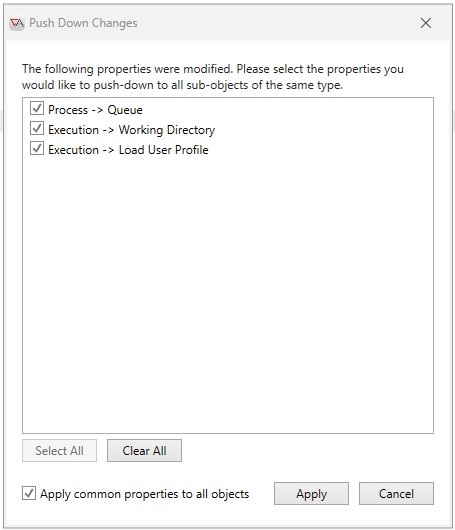
Each modified property is noted with a checkbox. You can decide at this point whether to apply all the properties selected to all nested objects that match the object type you are creating the policy for. If the property is checked, it will be applied as soon as you confirm by pressing the Apply button.
If the property you modified is common to all object types - you can elect to apply those properties to different object types by enabling the “Apply common properties to all objects” checkbox.
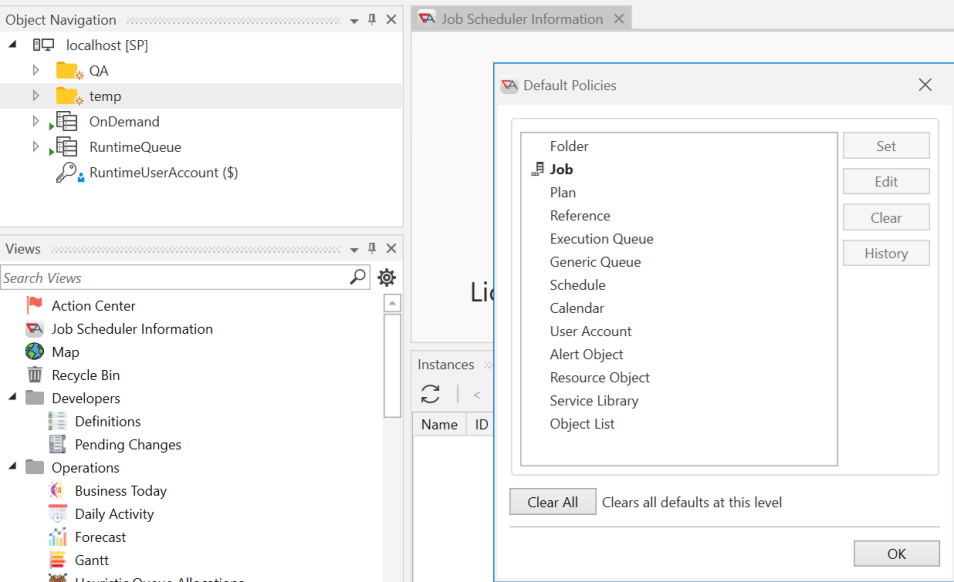
When you are done presetting properties, click the Save or Save and Close toolbar item. When a default policy is set on a Folder or Plan, the Folder or Plan's icon in the Object Navigation pane will change to indicate this with a star ![]() . Also, the Default Policy window, as depicted below, will display object(s) configured using a default policy in bold letters, and with an icon to the left of the object type.
. Also, the Default Policy window, as depicted below, will display object(s) configured using a default policy in bold letters, and with an icon to the left of the object type.
How default policies are applied to newly created objects
Any time you add a new object type, the system looks to the closest (parent) container object for a default policy (to see if one has been configured).
For example, if you are adding JobA to Folder2, the system checks to see if a default Job policy has been set on Folder2 (since Folder2 will be the Job's parent container after it is saved). If the system finds a default policy on the parent container (Folder2), it stops looking and uses it. If it does not find a default policy on the parent container, it will look to the next closest container for the object being added. In continuing with our example, if JobA is being added to Folder2, and Folder2 is a child object of Folder1 (JobA's full path is /Folder1/Folder2/JobA), the system will look to see if a default Job policy has been set on Folder1 (if it does not find one of Folder2). If it finds a policy there, it stops looking and uses it. If it does not find a policy, it looks to the next container (in this example, only the root is left), looking for a default Job policy. As stated, the system stops looking for a policy as soon as it finds one. If one is not found, the property sheets for the new object will be tabbed in the Main view and consist of factory default property settings, including security.
Security is often a consideration when setting default policies. Oftentimes factory default security is not what customers want to keep. Therefore, setting up a default policy that includes the security that the new objects should be configured with is frequently used. Keep in mind that every object type (e.g. Queue, User Account, Job, Plan etc.) that a user can create should have a default policy created with security configured, unless you want the object to consist of factory default security.
Note: Security cannot be pushed down to existing objects using the default policy Push Down Changes feature. However, security can be pushed down from the container-level to child objects (and nested child objects) using properties on the container's Security property sheet. When the container's "Inherit Security from Parent Object" property is checked (a property on Plans/Folders but not applicable to the Scheduler root), you can push down "Inherit Security" to the child objects - meaning the child objects security will be removed and replaced with Inherit Security (the Inherit Security checkbox will be checked). See the "Enable inherit Security on all child objects" property to implement this change. If the container's "Inherit Security from Parent Object" property is not checked, then the container's security users and/or groups and their assigned permissions can be pushed down to child objects. See the "Replace permission entries on all child objects with entries show here" property to implement this change (this property is available on Plans/Folders and the Scheduler root).
Setting a default Job policy to preset the Job's Queue and User Account object is another good use of default policies. Every Job must be associated with a Queue and User Account. When presetting these values in a default Job policy, the Job author creating the new Job does not have to populate these properties using the dropdown list to navigate to, then select, the desired Queue or User Account. If the Queue and/or User Account is different based on the type of Job being added, then create different containers for those objects and set the default Job policy accordingly.
Note: Default policies can be overridden by the user creating the object. For properties that support entering a simple string or numeric value, the user can delete the default policy value and enter their own value. For properties that support a checkbox, the user can uncheck the box, and so on. However, if the property that is being overridden is referencing an object (e.g. a Queue, User Account, Schedule, Alert, etc.), then the user must be granted the "use" permission for the object they are selecting to override the default policy with. Otherwise, they will receive an access denied error when attempting to save the object.