Using Tags
Tags are used by associating them to one or more objects. One way to associate a given tag to an object is to drag the tag and drop it on the desired object, or drag the object and drop it on the desired tag. For example, to associate the Plan object named “DBFTPPlan” to a tag, drag the plan object to the desired tag (in this example, a tag named “IT”) and then drop it. This dialog will appear:
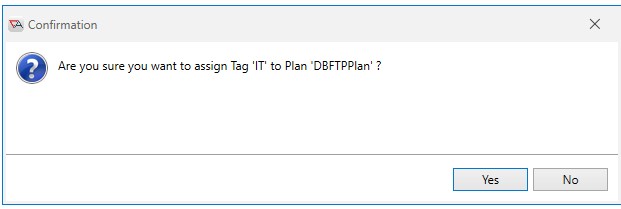
Click the “Yes” button to confirm the tag association. You can now confirm the tags associated with an object by right-clicking on the object (for example, WebServices) and hover over “Tags”.
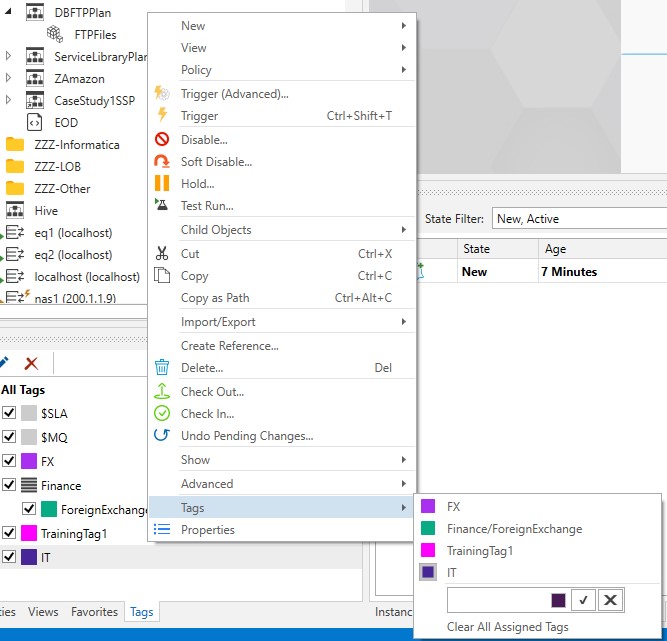
Notice the outline around the color of the IT tag. Tags outlined in such a manner are associated (assigned) to the object. Therefore, IT is associated to the object, but the Finance/ForeignExchange, FX and TrainingTag1 tags are not, since their color is not outlined like IT is. Using this menu option, you can also elect to clear any assigned tags (you will not be prompted to confirm a clear operation) or create a new tag for the object. If you create a tag via the menu option depicted above, it will be associated to the current object (when saved), and added to the Tags view.
Another way to associate a tag to an object is to right click on the object and select Tags, as depicted in the image above. Click on any tag that is not outlined. In doing so, the tag will be associated to the object. Please note if you click on a tag that is already associated to the object (it has an outline around it) - this will clear the tag, meaning the object will no longer be associated to the tag. In summary, selecting an outlined tag clears (removes) the tag, and selecting a tag not outlined assigns the tag.
Assigning and removing tags are all actions recorded in the audit trail of the object you are making tag changes for. See the object's Analytics tab, where "Tag" audits are displayed in the list.