Self-Service Portal Installation and Administration Guide
The ActiveBatch Self Service Portal (SSP) is a web-based software product, specifically designed for business or non-IT users, to allow those types of users the ability to run their own workloads or watch workloads that have meaning to their businesses or processes. Since it is a web-based application, no installation is required on a user’s computer for the product to be used.
Prerequisites
The ActiveBatch Self-Service Portal has prerequisites which require Microsoft’s Internet Information Service (IIS) Version 7 (or later) on a Microsoft Windows Server 2008 (or later) platform. We do not recommend that you use a workstation-based operating system.
ActiveBatch Self-Service Portal requires that the following software and actions be installed and/or performed prior to installation:
-
Microsoft .NET Framework Version 4.8.
-
IIS Metabase Compatibility must be installed under IIS Management Compatibility.
-
Windows WCF Framework (both HTTP and HTTPS activation).
-
Microsoft UAC should be turned off during the installation.
-
Installation should be performed by an administrator-level account.
-
IE Enhanced Security Configuration should be turned off on the IIS Web Server if your user wants to access Web Console from the local Internet Explorer browser.
The product is distributed using a Microsoft Windows Installer package. The installation package depends on the machine and platform you are installing the product on. For x64 (64-bit) installations, use ActiveBatchWebConsolex64.msi.
Note: ActiveBatch Self-Service Portal can only be used in conjunction with ActiveBatch V12 and later releases.
Job Scheduler and IIS
ActiveBatch Self-Service Portal supports secure connection via HTTPS. The SSP IIS should not be installed on the same machine as the Job Scheduler since SSP HTTPS connections and Job Scheduler Service Web Services (JSSWS) connections will both use port 443 by default. The certificate must be created and added as a binding on IIS manually.
The JSSWS, by default, communicates via SSL on port 443. This may conflict with other port bindings. To change the JSSWS port, set the desired port value under the JobSched registry key with a DWORD key named "WebServicesHttpsPort". To access the JSS via SSP, enter the FQDN with the new port number appended, e.g. "jss.domain.com:442".
SSP allows to connect to a Job Scheduler CNAME alias. The certificate must be created manually using a Subject Alternative Name containing the aliases with which the JSS will be connected.
Information for troubleshooting certificate issues between the Self-Service Portal IIS Server and the Job Scheduler machine can be found in the Knowledge Base article below:
https://www.advsyscon.com/en-us/myasci/kb-view?articleid=20150626095708
By Default, the Job Scheduler Server Web Services supports the following authentication types: Basic, NTLM, Digest, and Negotiate. In order to be FIPS Compliant, Digest Authentication must be disabled. With V12 it is disabled by default. If you need to enable Digest Authentication Binding Flags (and not be FIPS Compliant) the following registry value below should be set on the Job Scheduler Server.
A Registry Key 'JSSWS' must first be created at the location:
Computer\HKEY_LOCAL_MACHINE\SOFTWARE\ASCI\ActiveBatch\VXX\JobSched\JSSWS
on the Job Scheduler Server.
The registry value is a DWORD (32-bit) Value that should be created in the 'JSSWS' key location. A decimal value of 0 turns Digest Authentication off, and a decimal value of 1 turns Digest Authentication on.
Registry DWORD (32-bit) Value:
Name - UseDigestAuthentication
Value Data: 1 (Decimal)
Browsers Supported
ActiveBatch Self-Service Portal supports the following browsers. Note that regardless of the version specified below, once a browser version is not supported by the manufacturer, it will not be supported by this product as well.
Windows platforms
Microsoft Edge (25+), Internet Explorer (Version 11 or later update), Firefox (46+ or later), Google Chrome (51+ or later), Safari (Mac 5+).
Please read: https://www.microsoft.com/en-us/WindowsForBusiness/End-of-IE-support for more authoritative information.
Apple platforms
Safari (5 or later), Firefox (29.0 or later), Chrome (35.0 or later)
Linux platforms
Firefox (29.0 or later) and Chrome (35.0 or later)
Minimum Resolution
1280x1024. Recommended: 1680x1050
Tablet platforms
Apple iPad Safari 9.3+
Android Chrome 43.0+
Installing Internet Information Services (IIS) for Microsoft Windows 2012 R2 (and up).
Internet Information Services, or IIS, is not installed for a default installation of Microsoft Windows. To install IIS, start by accessing the Server feature and select the IIS Web Server role.
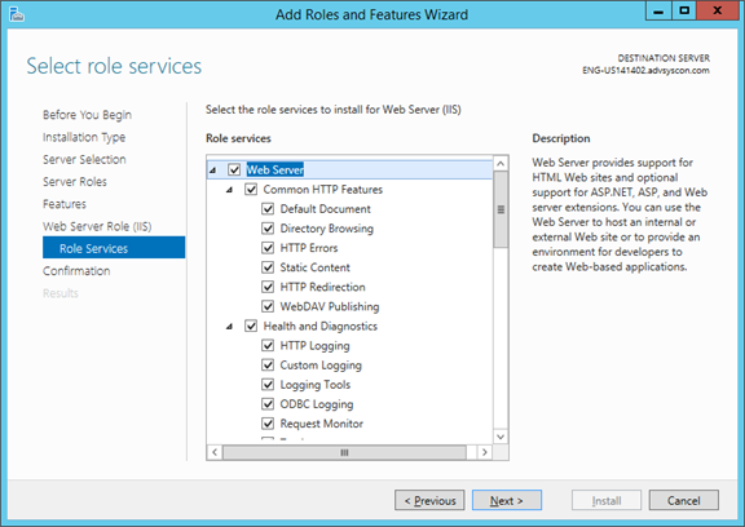
Adding IIS Role
Installation of Self-Service Portal
Start by executing the ActiveBatchSelfServicePortal.msi installation kit. This will begin the installation process. The first several installation dialogues are straightforward.
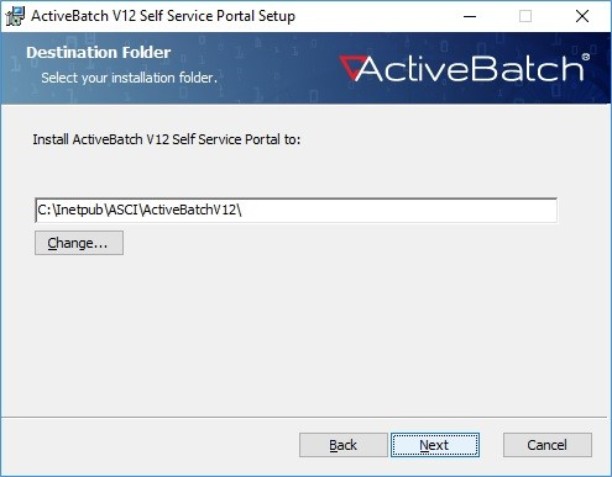
Choose Directory Location
The installation process will then examine all your fixed disk drives for a directory named "Inetpub". If it is found, then the default installation path will be "\Inetpub\ASCI\ActiveBatchVXX\".
You can use the default as shown or click the "Change" button to specify a different location. Click the “Next” button and then click “Install” to begin the process of copying the necessary files into the specified directory. The installation will then start the ActiveBatch Configuration Manager tool.

SSP Initial Configuration Startup
To begin the SSP Configuration process, click the “Configure Installed Features” link.
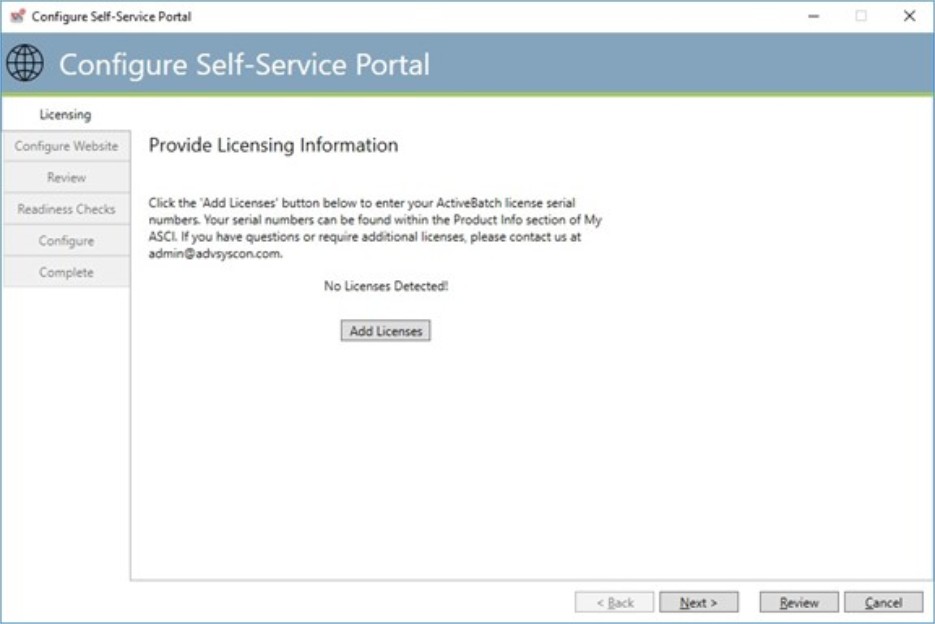
Initial License Configuration
The first phase of configuration is specifying your licenses. To add licenses, click the “Add Licenses” button.
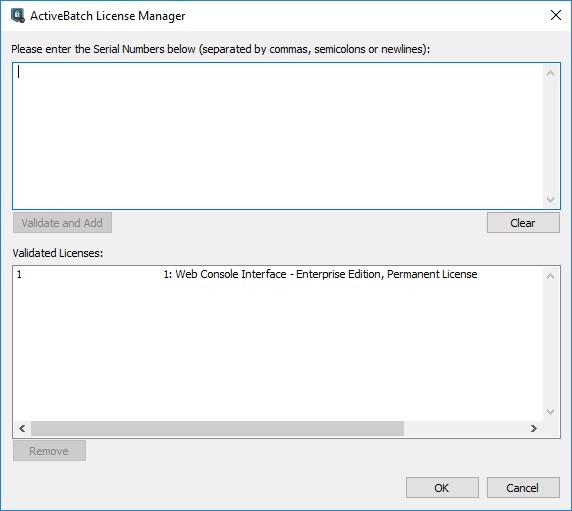
SSP License Specification
The next step during the configuration process is to enter your ActiveBatch Self-Service Portal permanent or evaluation serial number or ActiveBatch Scheduler evaluation serial number. Enter the serial number(s) provided to you by Advanced Systems Concepts and click on the “Validate and Add” button to use your serial numbers with ActiveBatch Self-Service Portal. Once the serial numbers have been validated successfully, click the “OK” button to continue the configuration process.
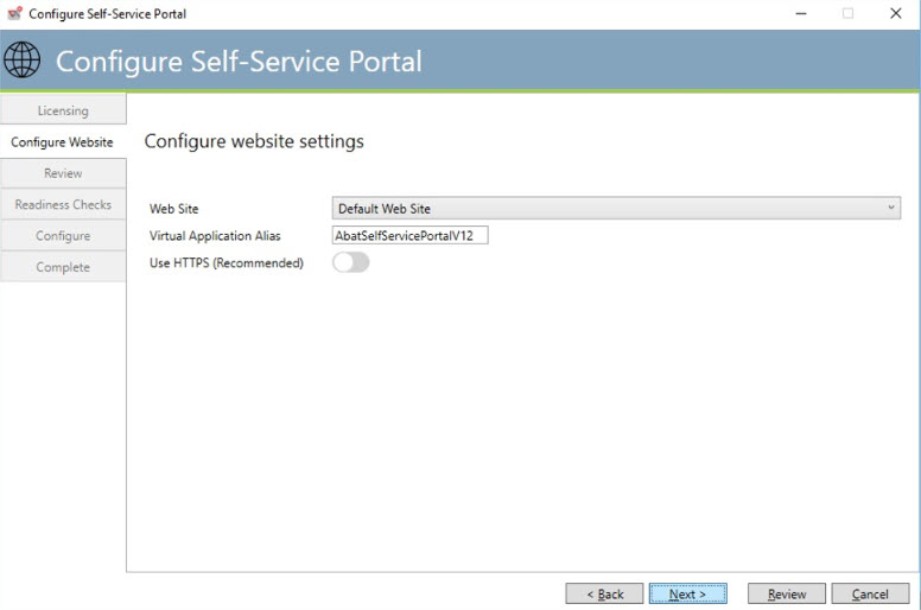
Configuring the SSP Website
The next step in the installation process will populate a list of Web Sites that are already configured on your local IIS server. If you have a preferred web site that you would like to add ActiveBatch Self-Service Portal to, then select it from the drop-down list of Web Sites. The way you access ActiveBatch Self-Service Portal will be dependent on the Web Site selected. The “Default,” or “Default Web Site,” will typically be configured as the local IP address, or machine name, running on port 80.
You will need to specify a Virtual Application alias that should be created in your IIS environment for the ActiveBatch Self-Service Portal. The “Virtual Directory Alias” will be the folder used to access ActiveBatch Web Console. In the above example we would access ActiveBatch Self-Service Portal by one of the following (note the URL is not quite complete):
http://localhost/AbatSelfServicePortalVXX/
http://machine-name/AbatSelfServicePortalVXX/
http://127.0.0.1/AbatSelfServicePortalVXX/
The last property “Use HTTPS” should be enabled (and is recommended) for secure communications.
Should you need to make custom configurations for the web site or virtual directory, you must do so via Internet Information Services Manager after the installation process completes. Click the “Next” button to continue the installation process.
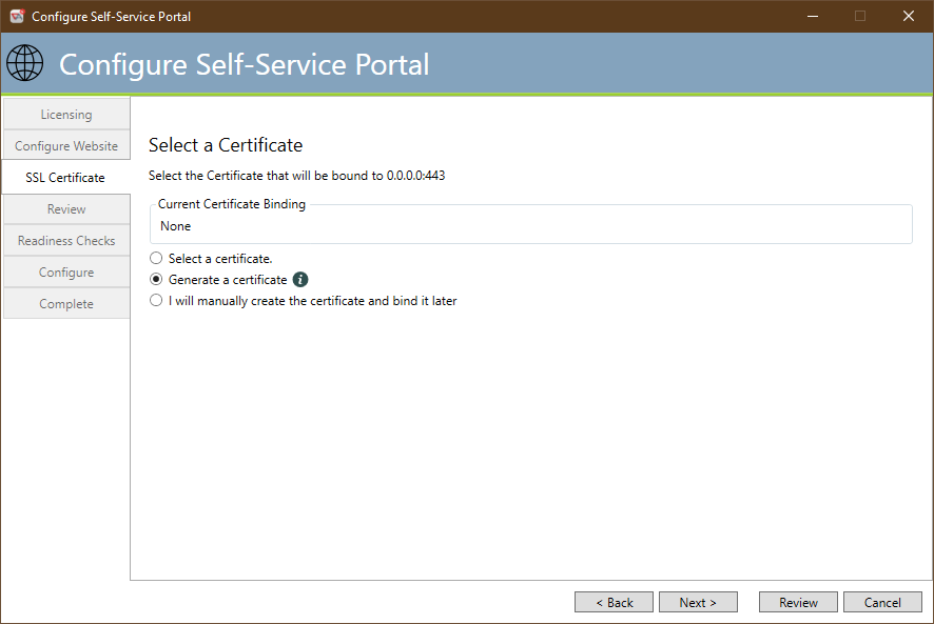
Select/Generate a Certificate
This dialog appears if the “Use HTTPS” checkbox on the Configure SSP Website dialog is checked. This dialog allows you to select a certificate or generate a new certificate to be used for the website. In addition, logic is present to determine if an existing website is in use and to determine the HTTPS port to be used (default is 443).
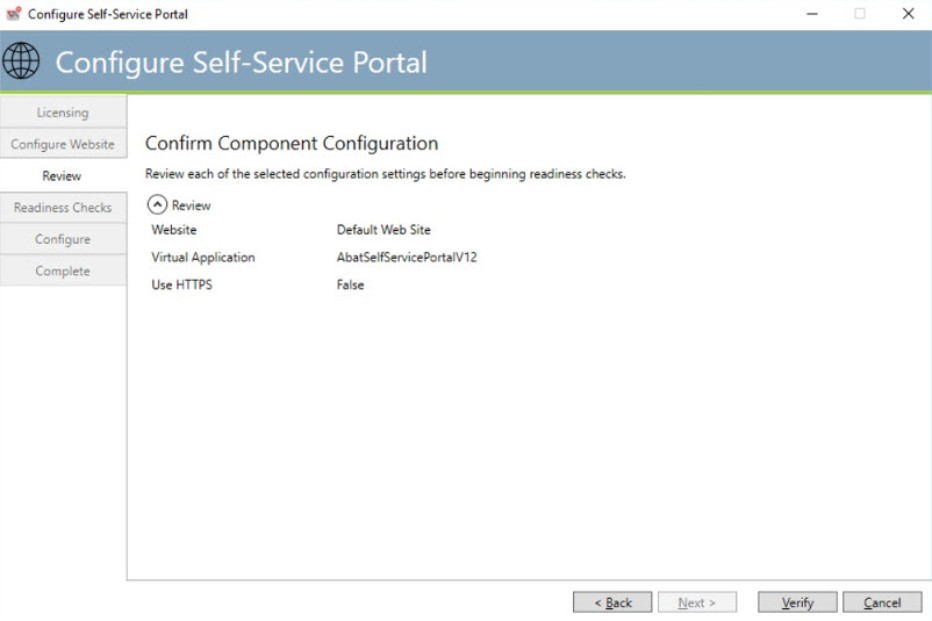
SSP Configuration Review
This dialog allows you to verify the configuration parameters entered for the Self-Service Portal. Click the “Verify” button to proceed.
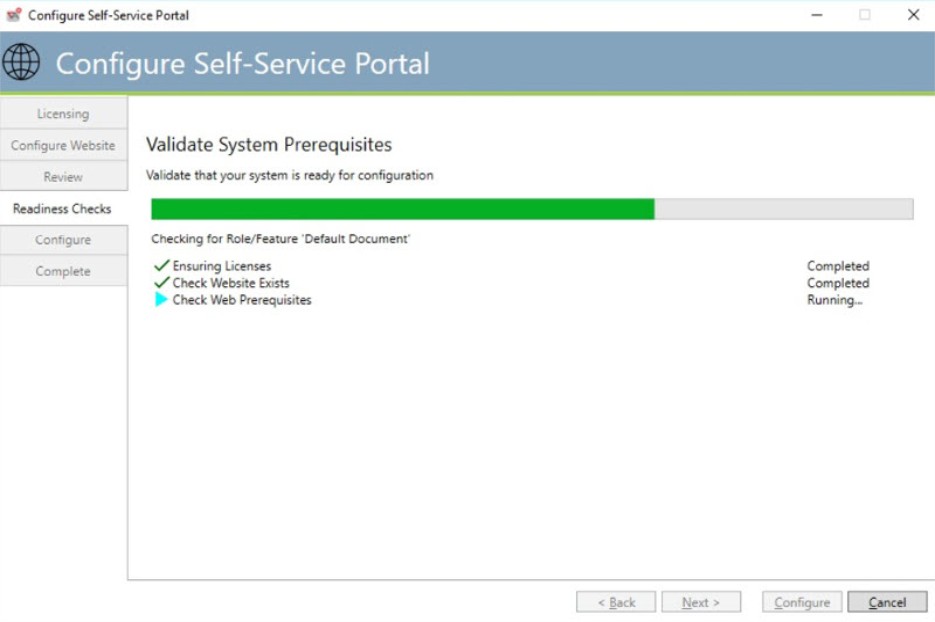
Readiness checks
This dialog verifies the information that you provided. Any failures are displayed. If the checks proceed successfully, the “Configure” button will be enabled for you to proceed.
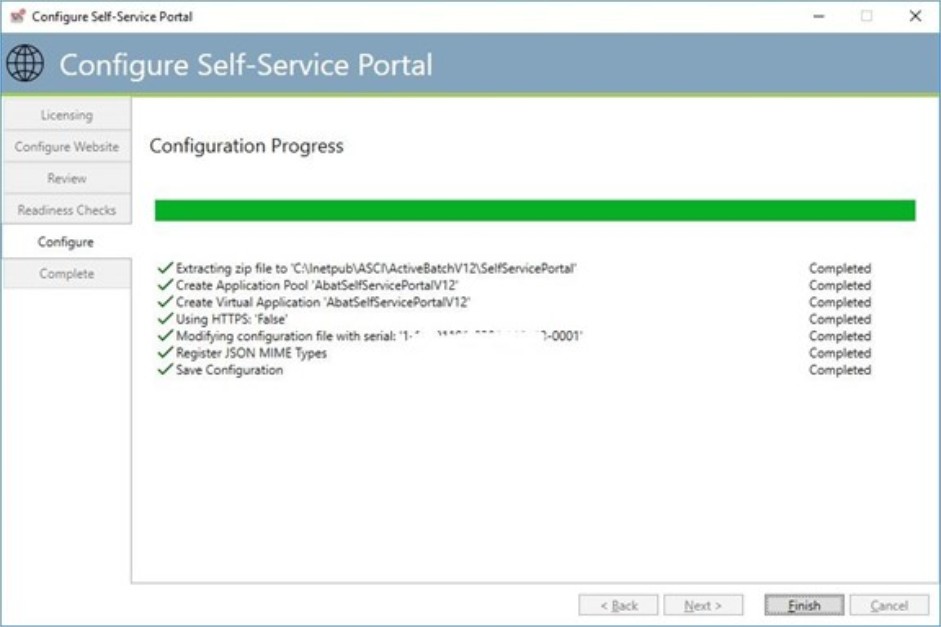
Configuration applied
If everything proceeded properly, you should see “Completed” next to each item. The “Finish” button will be enabled for you to click “Complete” and formally complete the installation.
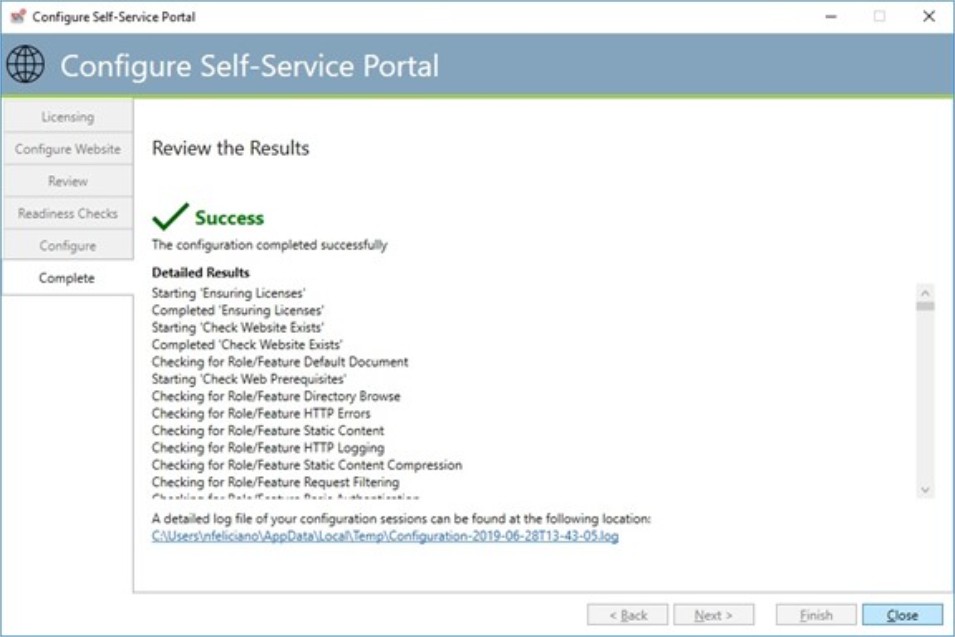
Complete
The dialog above is what a successful installation and configuration looks like.
If you need to update the SSP in the future, simply execute the ActiveBatch Management Console and select “Self-Service Portal”. A dialog similar to the one below will appear. To change any configuration parameters, click the “Change IIS” button. The dialogs found in the previous section will appear in the same order.
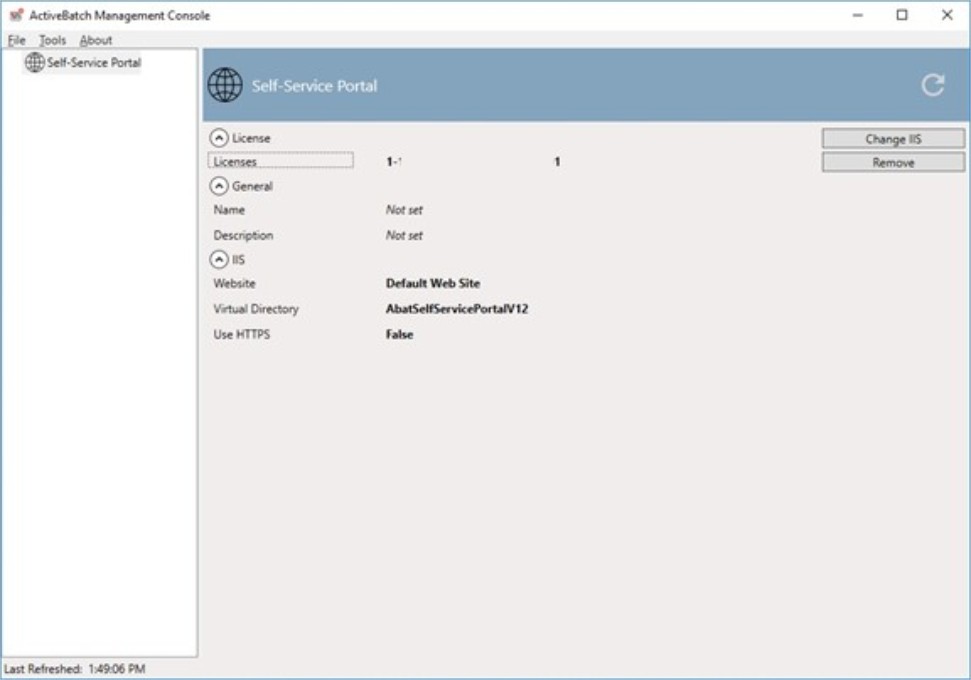
SSP Configuration Update
The design center for setting up the Self-Service Portal for non-IT usage falls on either the ActiveBatch Administrator and/or the person(s) or group(s) responsible for the underlying workflows that are to be accessed by the Business User.
Allowing access to workflows can be separated into two (2) major categories: Workflows that the Business User may run (trigger) for ad-hoc execution and Workflows that the Business User may watch (monitor) while executing. We will discuss security for the workflows a bit later but all workflow objects must be accessible to the Business User, using standard ActiveBatch security, based on what the Business User is allowed to perform (i.e. Run or Watch).
Object ID (the SSP Starting Point)
For a Business User to connect to a Job Scheduler through the Self-Service Portal requires certain information to be provided in the form of a URL. The URL is typically composed of the following elements:
http[s]://ssp-iis-fqdn/virtual-directory-alias/?scheduler=job-scheduler-hostname&objectid=nnnnn[/username=username-spec]
For example:
http://ssp.company.com/AbatSelfServicePortalV12/?Scheduler=dev&objectid=99128399
where:
“ssp.company.com” is the system where IIS and the Self-Service Portal is installed.
AbatSelfServiceV12 is the Virtual Directory alias created during the installation.
Scheduler=dev is the hostname of the Job Scheduler system.
Objectid=99128399 is the object id of the folder under which the Run and Monitor Object Lists are stored.
Username=username-spec which is a Windows User specification (i.e. user@domain)
An optional tag of &username=windows-user may be specified to lock the user’s login credentials. If omitted, the Business User will typically enter his own Windows logon credentials.
Let’s discuss the ObjectID. The ObjectID represents a Folder in which the Run and Monitor Object Lists are located. In many respects the ObjectID and associated Folder object represent a starting point for the SSP system. Please note that the Object List(s) can contain paths to objects anywhere within the ActiveBatch system. So please don’t think of the Object ID Folder as a type of virtual root. It isn’t. The beauty of this approach is that you can create as many Folders containing Object List object(s) as you desire, possibly for each Business User, without disturbing the existing hierarchy you already have in place for your workflows.
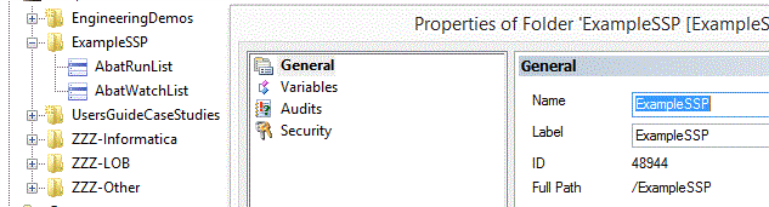
Example Folder for Object ID
Run and Monitor Object Lists
To ease administration and setup of the Self-Service Portal, existing workflows are expected to be used with SSP. The SSP implementation depends on two (2) reserved-named object lists to categorize the Run and Watch workflow lists.
AbatRunList – This named Object List contains all the workflow objects (specifically but not exclusively, Plans, Jobs and Reference Objects) that Business Users may run (or trigger).
AbatWatchList – This named Object List contains all the workflow objects (specifically but not exclusively, Plans, Jobs and Reference Objects) that Business Users may watch (or monitor).
While the above names use capitalization for readability, the actual object names are case-insensitive.
The above Object Lists must appear together at the same ActiveBatch hierarchy level.
Security and User Account Credentials
The security of the workflows and the reserved Object Lists must be accessible and proper for the Business User. The Object Lists must have at least Read and Use level permissions. The objects within the workflows should have at least Read level permission. If the workflows are listed within the AbatRunList then the Trigger permission must be added for either the Business User or associated group.
When a Business User triggers a job or workflow, the default user credentials to use are those that have been saved with the job or workflow objects. If you need to have the Business Users credentials used the following procedure must be used:
First you must create a variable for every Job or Plan object in which you want the Business Users triggering credentials to be used. That variable is named #AbatUser_username where username represents the Windows username (without a domain name specification). For example, if joesmith@company.com is logged in, the variable name would be #AbatUser_joesmith. The value of the variable is a path to the User Account object that is to represent Joe Smith’s credentials. So if five (5) different Business Users were meant to run the job, you would create five (5) different variables pointing to their own User Account objects.
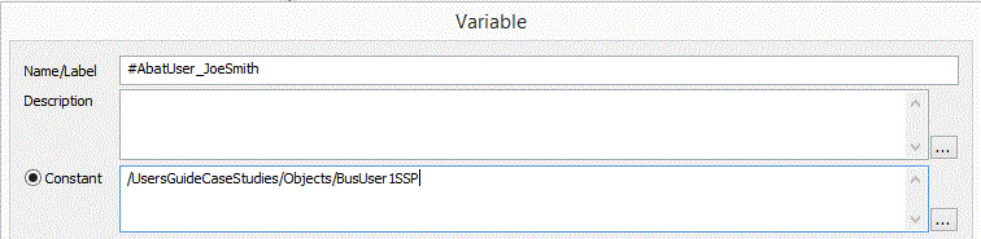
User Account Variable
The above figure illustrates an example where the Business User “JoeSmith” credentials are to be used. The variable contains the Windows username as a suffix to the #AbatUser_. The value is a path to the actual User Account object that contains Joe Smith’s security credentials (note while those security credentials may normally be Windows credentials they need not be; the User Account object can contain any valid credentials (i.e. UNIX, Linux, etc) as may be required for the underlying job or workflow).
Note: You must set the variable to “Required”. Otherwise, you will see a “Some variables are missing” error with #UserAccount noted as the missing variable.
With the variable set we now need to arm the mechanism that allows User Account specification at run-time.

Runtime User Account Selection
Specifying /RuntimeUserAccount for the Execution User arms the mechanism for specifying that the Execution User’s security credentials will be supplied at run-time. The last requirement is that we specify the User Account object (/UsersGuideCaseStudies/Objects/BusUser1SSP) within “Use Associations” to ensure we meet the proper ActiveBatch security requirements.

Use Associations for Runtime Account
URL Generation
To access the SSP, a Business User must be given a proper URL string that will cause the proper SSP execution and contact the appropriate Job Scheduler system. The syntax for the URL was previously described. To generate the URL string for you, ActiveBatch provides a SSP URL operation from either ActiveBatch Console or the ActiveBatch Web Console. Using the ActiveBatch Console, right-click on the Folder object containing the reserved Object Lists and select Advanced.. Self-Service Portal URL as shown below.
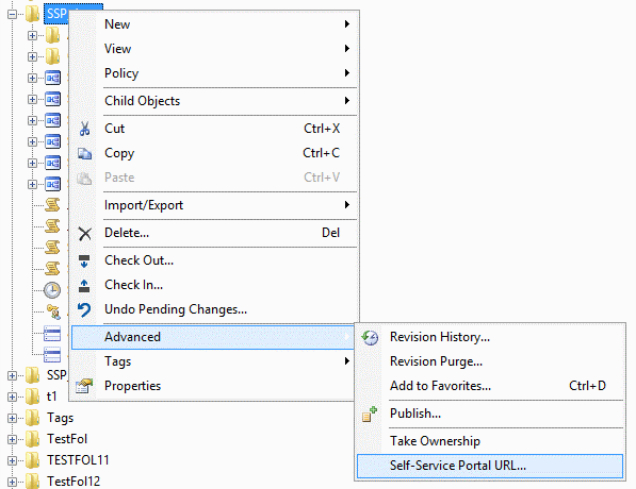
Self-Service Portal URL
Executing this operation causes the following dialog to appear.
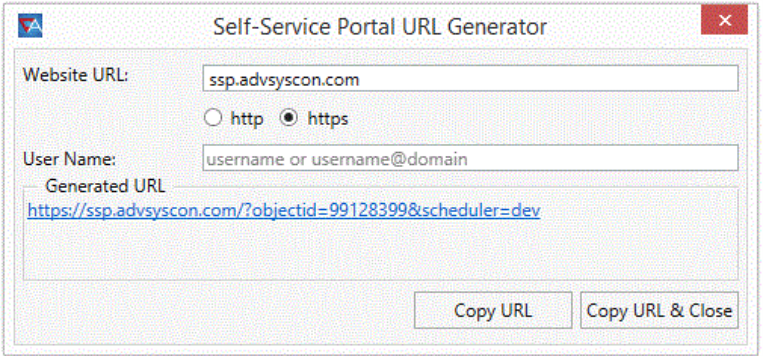
Generate SSP URL
The dialog requests the website URL hosting the Self-Service Portal software. In the example above, “ssp.advsyscon.com” has been specified. HTTPS is selected for the protocol. We elected to omit the default User Name specification (which would represent a user’s Windows login credential). By omitting this field, we allow the Business User to specify the username. If you specify this field, the Business User would be locked into that specific username.
Note that the Generated URL string contains the information entered as well as the Job Scheduler name and the Object ID of the selected folder. Two (2) buttons are provided. Both will copy the URL into a copy buffer for subsequent pasting, for example, into a mail message.
Logo Customization
ActiveBatch Admins have the ability to establish custom logos for their company and its use of the ActiveBatch Self-Service Portal. Two (2) customizations are currently provided. These can be found on the Settings dialog within SSP. Note: These customizations are company-wide per IIS SSP area. So once set they will be seen by everyone who connects to that IIS SSP system.
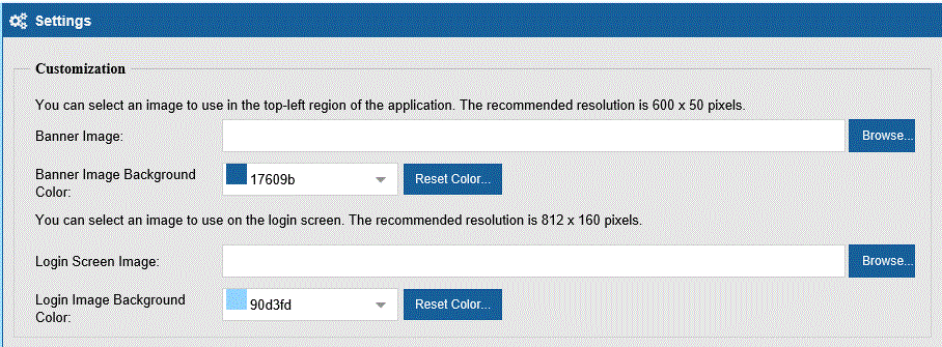
Banner image concerns the blue banner that appears at the top of the screen with “ActiveBatch Self-Service Portal” to the right. The recommended resolution is 600 x 50 pixels.
Login Screen image concerns the login screen the Business User sees when logging into the SSP. The recommended resolution is 812 x 160 pixels.
Both customizations allow for a background color to be selected.
The “Reset Color” button allows you to reset back to the default color.