Configuring the Windows Execution Agent
After you install the ActiveBatch software on a designated system, an ActiveBatch “Management Console” icon will be added to the system’s desktop. In addition, right after the software is installed, the Management Console application will be opened automatically, since this is the next step required in getting your Scheduler environment up and running, and configuring the features you opted to install. The Management Console configuration features are displayed in alphabetical order. To the far right is a Refresh icon which allows you to refresh the properties of the selected component.
Note: ActiveBatch now installs Open JRE 17 with the Windows Execution Agent as a prerequisite for jobs running on the Windows Agents. This only applies to Windows agents. This JRE is not used by Java Job Steps which will continue to use "Java_Home".
By separating the installation of ActiveBatch features from the configuration of those features and components, it easier and simpler to change configuration parameters without requiring a re-installation or registry modification.
After installing the Job Scheduler (which automatically includes an Agent installation), configure the Execution Agent ("Agent") first. The Execution Agent is the component that runs ActiveBatch jobs. Every Job Scheduler includes an Agent installation because it is used to run built-in system jobs locally. You can run your own jobs on the Job Scheduler system as well, but keep in mind that system resources are needed to run jobs, so you may opt to run your jobs on remote Agent systems only. In addition, an Agent license is required to run jobs locally.
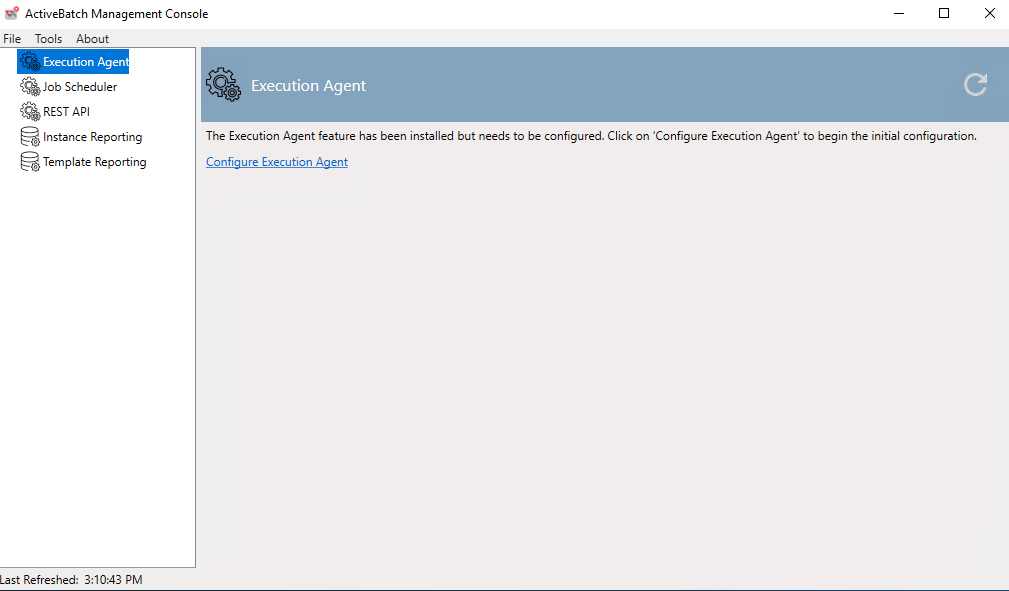
The image above depicts the beginning of the configuration of the Execution Agent. Begin by clicking on the “Configure Execution Agent” link.
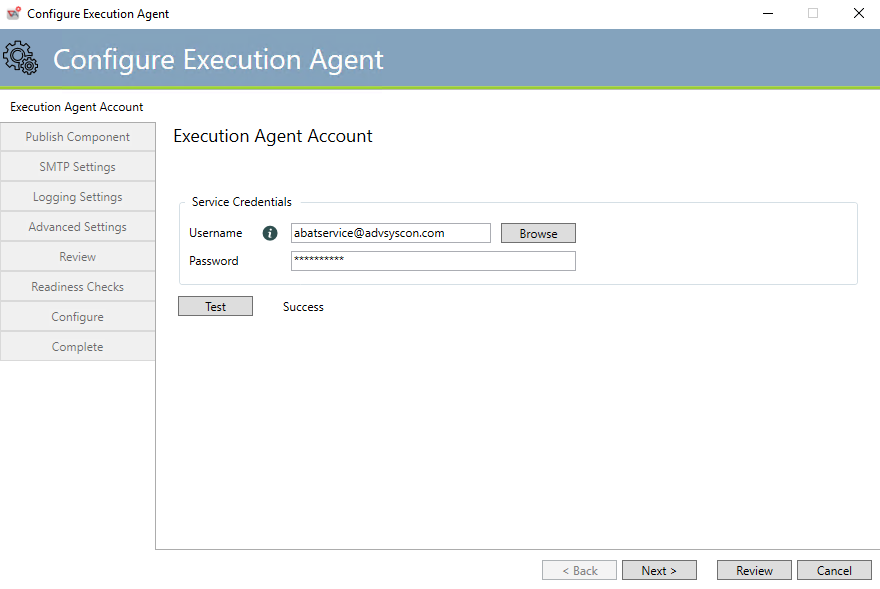
Execution Agent Service Account
-
ASCI requires that you associate an administrative account when running the Execution Agent service.
-
This is necessary for various network operations that may need to be performed such as Active Directory registration.
-
-
This account requires local administrative-level access as well as privileges.
-
ActiveBatch will implicitly add “Logon as a Service”, “Replace Process Token”, “Logon as a Batch job”, “Change Notification”, “Create Token”, “Debug Process”, “Increase Base Priority”, “Adjust Quota”, “Profile Process”, “Security/Audit”, “Update System Environment”, “Profile System”, “Act as part of Operating System”, “Impersonate Client after Authentication” rights to the specified account, for the local machine, if they are not present.
-
-
The account must exist prior to your specification. ActiveBatch will also attempt to verify that the account and password specified are valid.
-
You can click on the Browse button to lookup an account or simply type one in using UPN syntax (username@domain) or domain\username syntax, as both formats are supported.
-
The information icon to the right of the Username field provides a tooltip that shows the 2 supported formats.
-
-
Next, enter the account password and then click the Test button to verify that the account and password specified are proper.
The Execution Agent service is configured to allow itself to be automatically restarted twice within a twenty-four (24) hour time period. You can change the recovery options of this service using either the ActiveBatch Service Manager or the Windows Services feature.
The Next button will move to the next sequential tab. The Review button will jump down to the Review tab. For New installations we recommend you click the Next button and look through the most popular component parameters.
Execution Agent Published Name
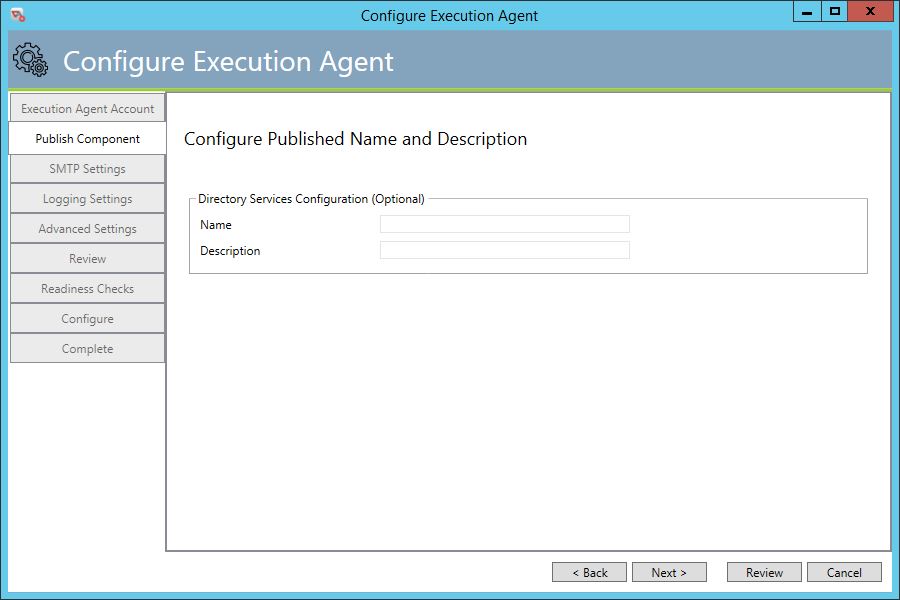
This tab is optional. Configuring a Published Name for an Execution Agent allows ActiveBatch to refer to the name and not use a hostname or IP address. This optional feature is useful when an abstraction to the actual machine is desired and allows for simply sliding a new system in place if an existing one fails (since the Execution Queue object will use the Published Name).
Note: For the published name feature to work, you must download a separate installer from the ASCI website named ActiveBatchDS.msi, and run it to allow the publication of Agent systems to Active Directory (AD) or Active Directory Lightweight Directory Services AD LDS).
The Back button will move to the previous tab. The Next button will advance to the next sequential tab. The Review button will jump down to the Review tab. For New installations we recommend you click the Next button and look through the most popular component parameters.
Execution Agent SMTP
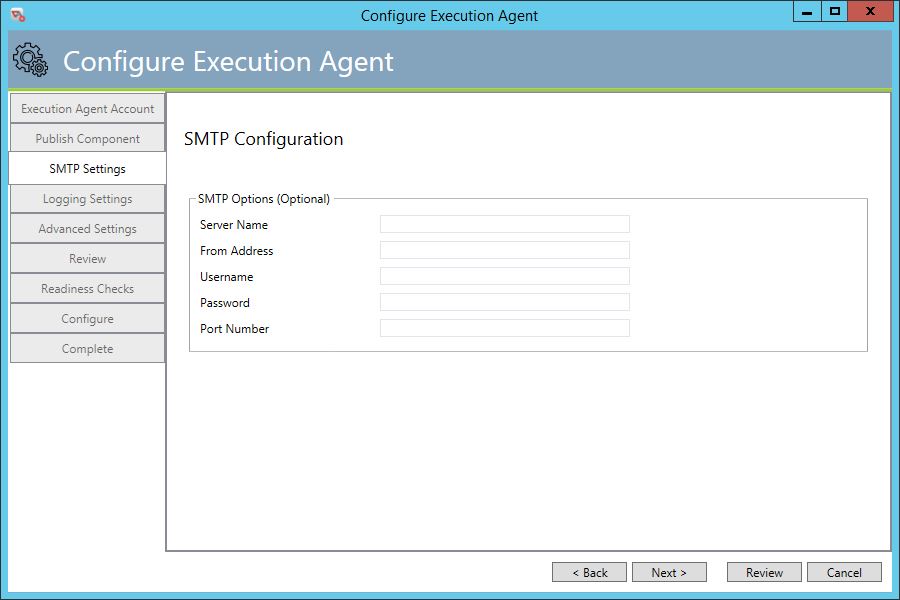
This tab is optional. It allows you to configure the SMTP settings for the Execution Agent. If left blank, E-Mail (SMTP) Jobs dispatched to the Execution Agent to run will use the SMTP server configured on the Job Scheduler.
Server Name: This property indicates the hostname or IP address of the SMTP Server to use for e-mail job steps that are executed on this Execution Machine.
From Address: This property indicates the value of the “From” field when composing an e-mail message. The syntax should be name@domain.ext.
Username/Password: This pair of properties indicates the Username and Password which are used when connecting to a secure email system.
Port Number: This integer property indicates the port number for SMTP Outgoing mail. By default, 25 is used.
The Back button will move to the previous tab. The Next button will advance to the next sequential tab. The Review button will jump down to the Review tab. For New installations we recommend you click the Next button and look through the most popular component parameters.
Execution Agent Logging
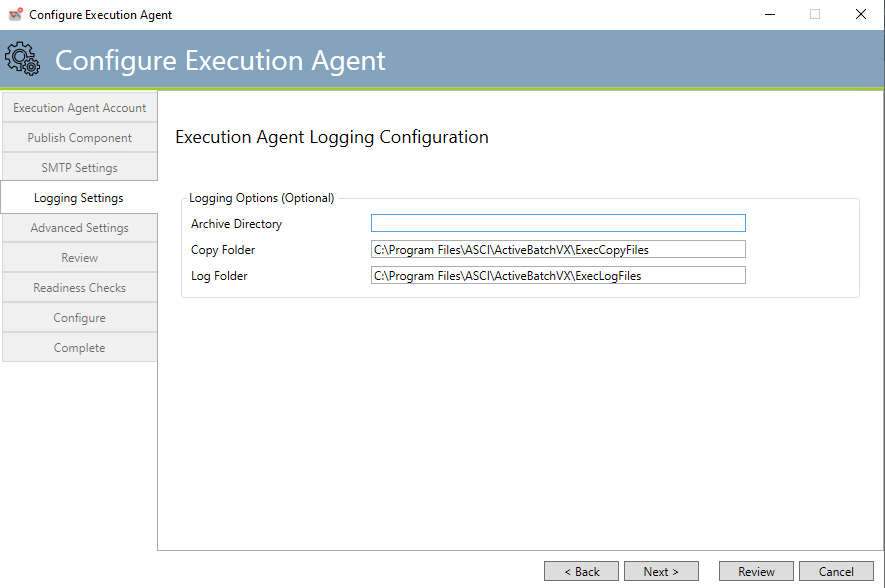
This tab is optional. It controls the settings for where centralized logging and implicit script copy operations are stored.
Archive Directory: This optional property controls whether Centrally Managed job log files should be moved to this archive directory before they are deleted from the central log file directories. This property value, if specified, must be a valid and existing path specification. By default, if this property is omitted, log files are not archived but deleted when their retention period expires.
Copy Folder: This required property indicates the path for storing script files which have the “copy” attribute set. The path must be a valid and existing path specification. By default, the path uses a portion of the Execution Agent’s installation path with the sub-folder “ExecCopyFiles” appended to the end.
Log Folder: This required property indicates the path for storing log files which use the Centralized Logging facility. The path must be a valid and existing path specification. By default, the path uses a portion of the Execution Agent’s installation path with the sub-folder “ExecLogFiles” appended to the end. A share named ASCI_ABATLOG will automatically be created that points to ExecLogFiles. The share is used to allow other ActiveBatch users the ability to view their log files.
The Back button will move to the previous tab. The Next button will advance to the next sequential tab. The Review button will jump down to the Review tab. For New installations we recommend you click the Next button and look through the most popular component parameters.
Execution Agent Advanced Settings
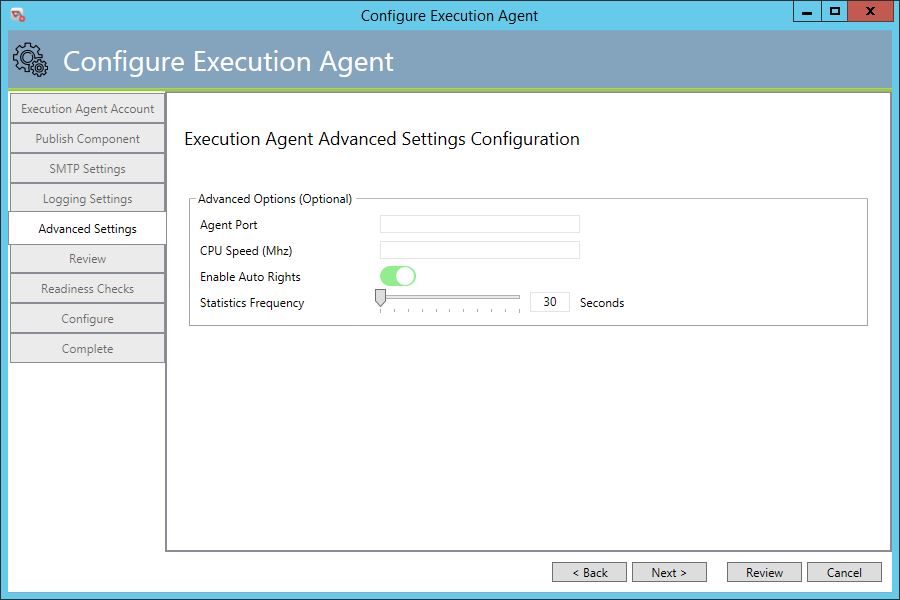
This tab is optional. It controls various advanced settings.
Agent Port: This integer property denotes the TCP/IP port number used by the Execution Agent.
CPU Speed (Mhz): This integer property denotes the speed of the CPU Processor in Mhz. This property is used as part of the Machine Characteristics section for an Execution Queue.
Enable Auto Rights: This Boolean property indicates whether the “logon as a batch job” right should be granted for execution user account. By default, the value is true (or enabled).
Statistics Frequency: This integer property indicates the length of time, in seconds, in which the Execution Agent will pass back a set of various performance characteristics to the Job Scheduler. These performance feedback values are used as part of the Load Balancing scheduling algorithm for Generic Queues.
The Back button will move to the previous tab. The Next button will advance to the next sequential tab. The Review button will jump down to the Review tab. For New installations we recommend you click the Next button and look through the most popular component parameters.
Execution Agent Review
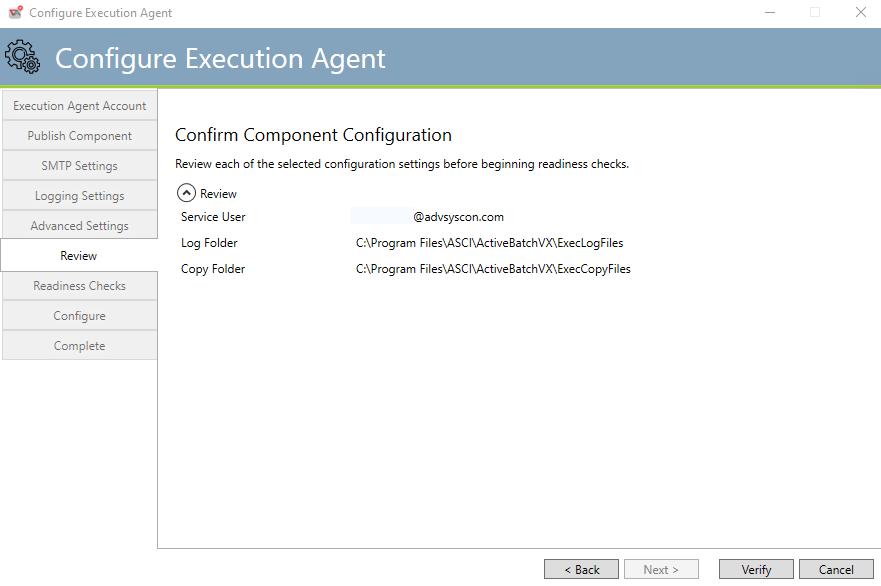
This tab allows you to review your specifications for the Execution Agent.
The Back button will move to the previous tab. The Verify button will cause a check of the specification entered before applying configuration changes to the Execution Agent.
Execution Agent Readiness Checks
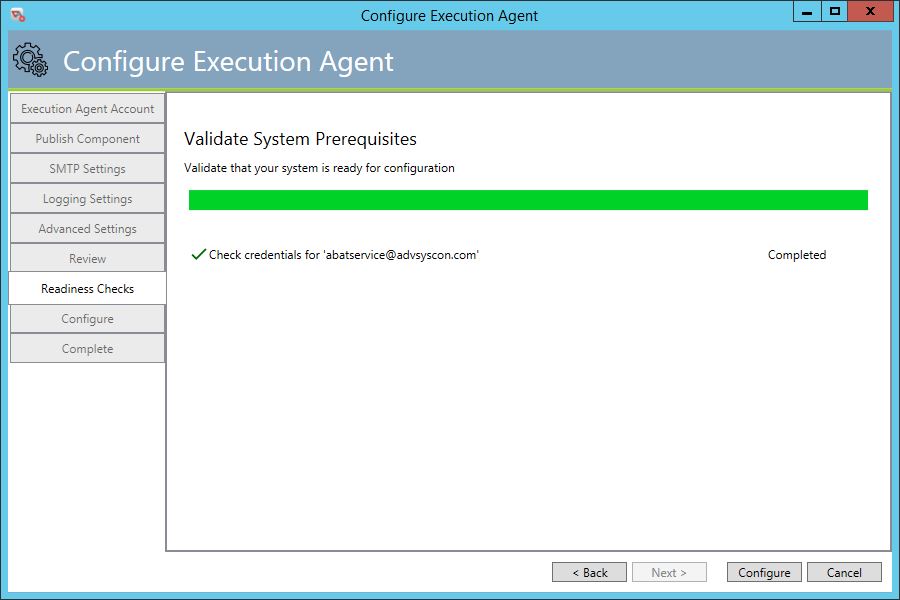
This tab checks the credentials that have been supplied for the Execution Agent and determines whether they can be used.
The Back button will move to the previous tab. The Configure button will apply any changed parameters.
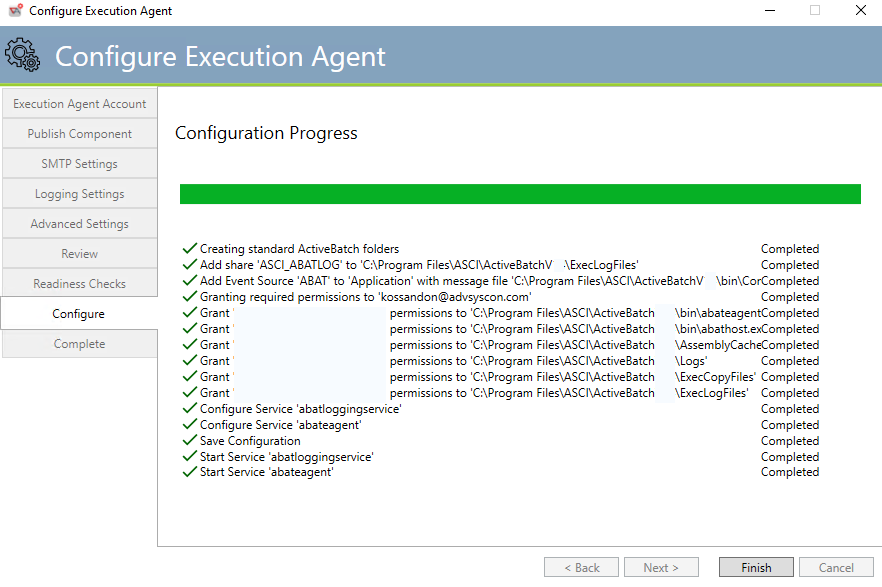
You will see various messages as the configuration process takes place. If everything is successful, the individual configuration steps will have a green check next to them, and also be marked “Completed”. The last statement should be Start Service ‘abategaent’. This is the Execution Agent Windows service name.
Configuration Progress
Click the Finish button to exit this configuration page.
Execution Agent Completion
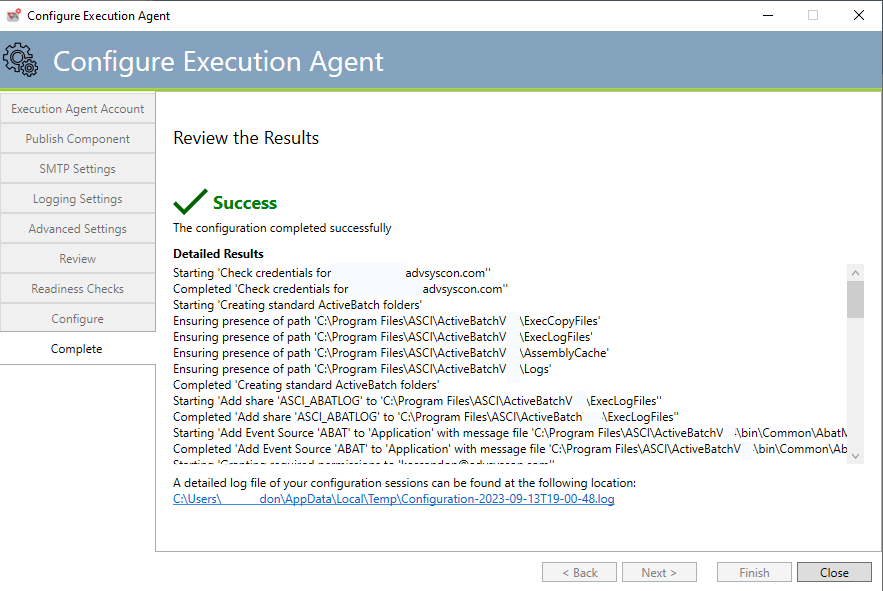
This is the final tab for the Execution Agent service configuration. All action items are present with an overall indication as to whether the configuration was successful. A detailed logfile is also available.
Clicking the Close button will cause the Configuration Manager home page to be displayed.
This allows you to configure the next component.
Execution Agent Configuration Modification
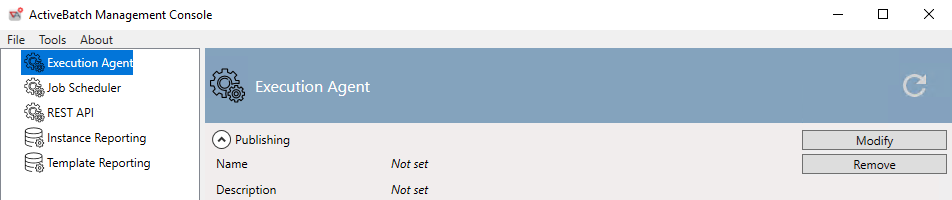
Once you’ve configured the Execution Agent (or any component) the initial configuration will contain two (2) additional buttons: Modify and Remove. Clicking the Modify button will cause the Execution Agent configuration tabs to appear. You will then be able to change any of the parameters you were shown during the initial component configuration.
Clicking the Remove button will cause the Execution Agent component to be removed as Windows service (and its other associated services, such as abatloggingservice). It will also remove other configuration items related to the Agent, such as deleting the share created for job log file storage (ASCI_ABATLOG). Remove does not remove the software that was installed in the ActiveBatch installation folder, which by default is Program Files\ASCI. This means you can reconfigure the Agent, if desired, from scratch, using the ActiveBatch Management Console, without having to install the software again.
Note: After configuring the Execution Agent installed on the local Scheduler server, configure the Job Scheduler next. See Configuring the Job Scheduler.