Configuring the REST API
After you install the ActiveBatch software on a designated system, an ActiveBatch “Management Console” icon will be added to the system’s desktop. In addition, right after the software is installed, the Management Console application will be opened automatically, since this is the next step required in getting your Scheduler environment up and running, and configuring the features you opted to install. The Management Console configuration features are displayed in alphabetical order. To the far right is a Refresh icon which allows you to refresh the properties of the selected component.
Note: The name of the ActiveBatch Management Console application is abatmgmt.exe, located in the bin folder of the ActiveBatch installation directory.
By separating the installation of ActiveBatch features from the configuration of those features and components, it easier and simpler to change configuration parameters without requiring a re-installation or registry modification.
The Management Console is used to configure the REST API.
ActiveBatch provides a REST interface for programmatic access to the various ActiveBatch objects and operations.
For a new installation, you would include “REST API” as part of the product Feature Selection portion of the installation.
For an existing installation in which you want to add the REST API feature, execute the following command (in Administrator context): (The parameters are explained in the section on Silent Installation).
msiexec /i ActiveBatch.msi ADDLOCAL=REST_API /l*v abat.log /qn
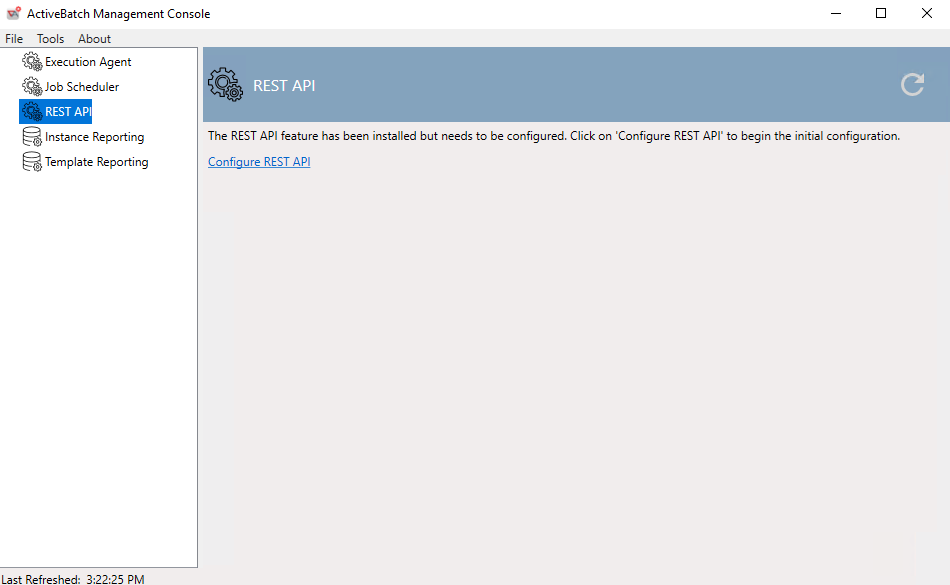
This command will install the REST API feature and configure it with default options. By default, it will use Port 443 and assume there is an existing certificate bound to that port. If there is an ActiveBatch Job Scheduler already installed on the server that you are adding the REST API to, then the certificate will already be present. If there is not a Job Scheduler on that server and you do not already have a certificate bound to the REST API port, then you will need to configure a certificate for the REST API to use. This can be done in the command itself (see the Silent Installation section of this document for details on the available options), or with the ActiveBatch Management Console UI after running the install command with default options.
The Configurator performs the following actions:
Creates a Windows Service with the following information:
-
Display Name: ActiveBatch REST API
-
Startup Type: Automatic
-
Logon As: Local System
Binds a Certificate to the Port on which REST API will be hosted unless the user opts out.
If the user selects the Generate a Certificate option, the Configuration tool attempts to request a certificate from the domain first. If the request fails, it creates a 1-year Self-Signed certificate in the Personal Store and copies it to the Trusted Root CA Store.
Otherwise, the certificate selected by the user will get bound to the Port.
Note: If an old certificate was already bound to the Port, it will get overwritten by the new certificate.
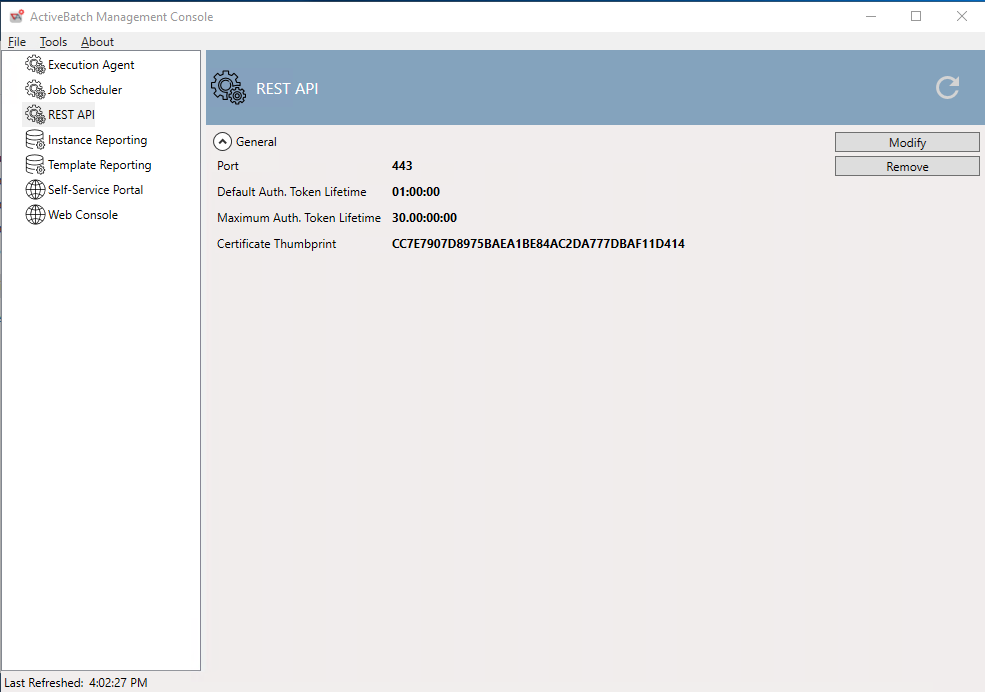
REST API Settings
General API settings. These settings may be adjusted; however, the default values should be used.
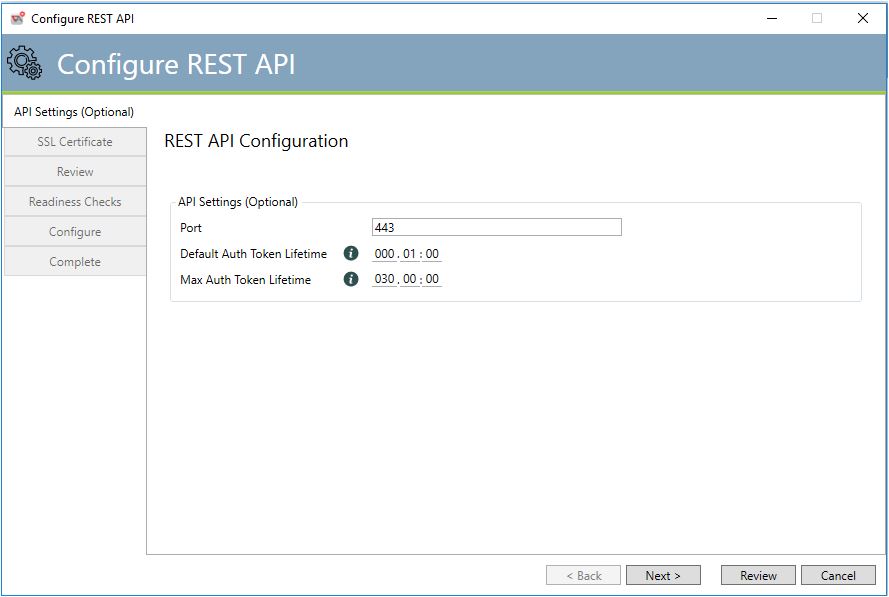
This tab controls the general settings for the REST API.
Port: The Port on which the REST API service will be hosted. Note: If another application is already using the provided Port, the abatapi service will fail to start with the following error: The Process cannot access the file because it is being used by another process.
Default Auth Token Lifetime: The default authentication token lifetime when none is specified on a login. Default is 1 hour. Max value is Max Auth Token Lifetime. Format: ddd.hh:mm.
Max Auth Token Lifetime: The maximum lifetime that can be requested for an authentication token on login. Default is 30 days. Max value is 365 days. Format: ddd.hh:mm.
REST API SSL Certificate
This tab controls the specification of the SSL Certificate. There are two (2) variations of options for this page depending on whether the Port was already bound to a certificate. First scenario. There is no certificate bound to the Port.
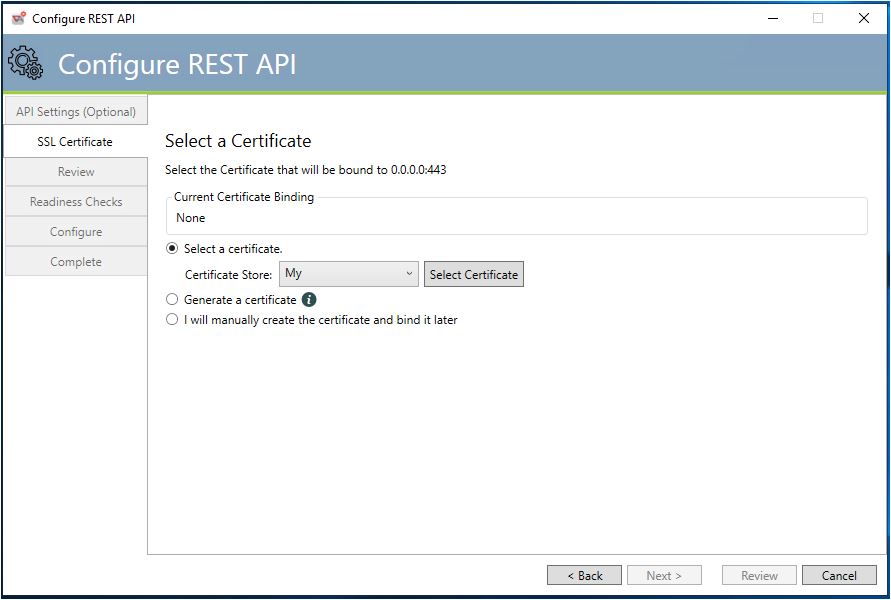
Select a certificate (default selection): Lets the user select the Certificate he/she would like to bind to 0.0.0.0:{Port}. The user needs to select the Certificate Store that has the certificate. By default, the selected store is My (Personal) store, which is the preferred one, because the user will definitely have access to the certificates inside it.Afterwards, hit the Select Certificate button, which pops up a windows dialog with all the available valid certificates under the selected store. If this option is selected, the user will not be able to hit Next on the Certificate page until a valid certificate is selected.
Generate a certificate: Indicates that the Configuration tool should attempt to request a certificate from the domain first. If the request fails, a self-signed certificate should be generated instead.
I will manually create the certificate and bind it later: Indicates that the Configuration tool should skip the 'Bind to port' step since the user wants to do it manually later.
Second scenario. There is already a certificate bound to the port.
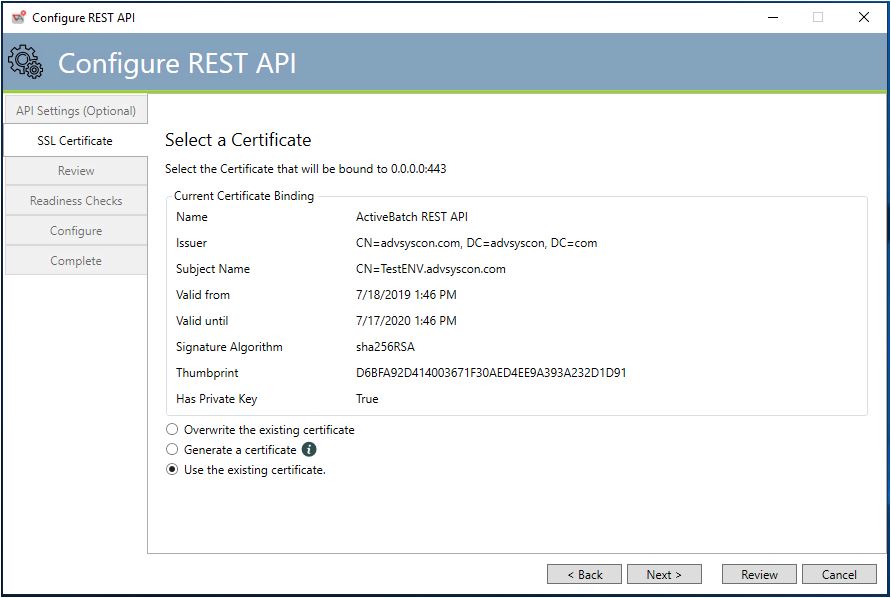
Overwrite the existing certificate: Lets the user select the Certificate he/she would like to bind to 0.0.0.0:{Port}.
Note: The selected certificate will overwrite the certificate already bound to 0.0.0.0:{Port}.
Generate a certificate: Indicates that the Configuration tool should attempt to request a certificate from the domain first. If the request fails, a self-signed certificate should be generated instead.
Note: The generated certificate will overwrite the certificate already bound to 0.0.0.0:{Port}.
Use the existing certificate (default selection): Indicates that the Configuration tool should skip the 'Bind to port' step since the certificate is already bound correctly.
The remaining steps are the same as for any of the Configuration components.
REST API Configuration Modification
This tab allows you to modify or remove the REST API feature.